4.9 Connecting to an SDMX registry
SDMX Constructor can also connect to a new SDMX registry (note: DLM is not a registry; .Stat Suite is. The DLM is composed of a set of back-office modules as one of the major components of the .Stat Suite that combines all data lifecycle management activities into one user interface.) directly, and users can directly pull or push (perhaps after editing) (with authentication credentials) artefacts from the SDMX Constructor.
- After launching the SDMX Constructor, click on the Registry, as shown below.
 Click here to enlarge the image
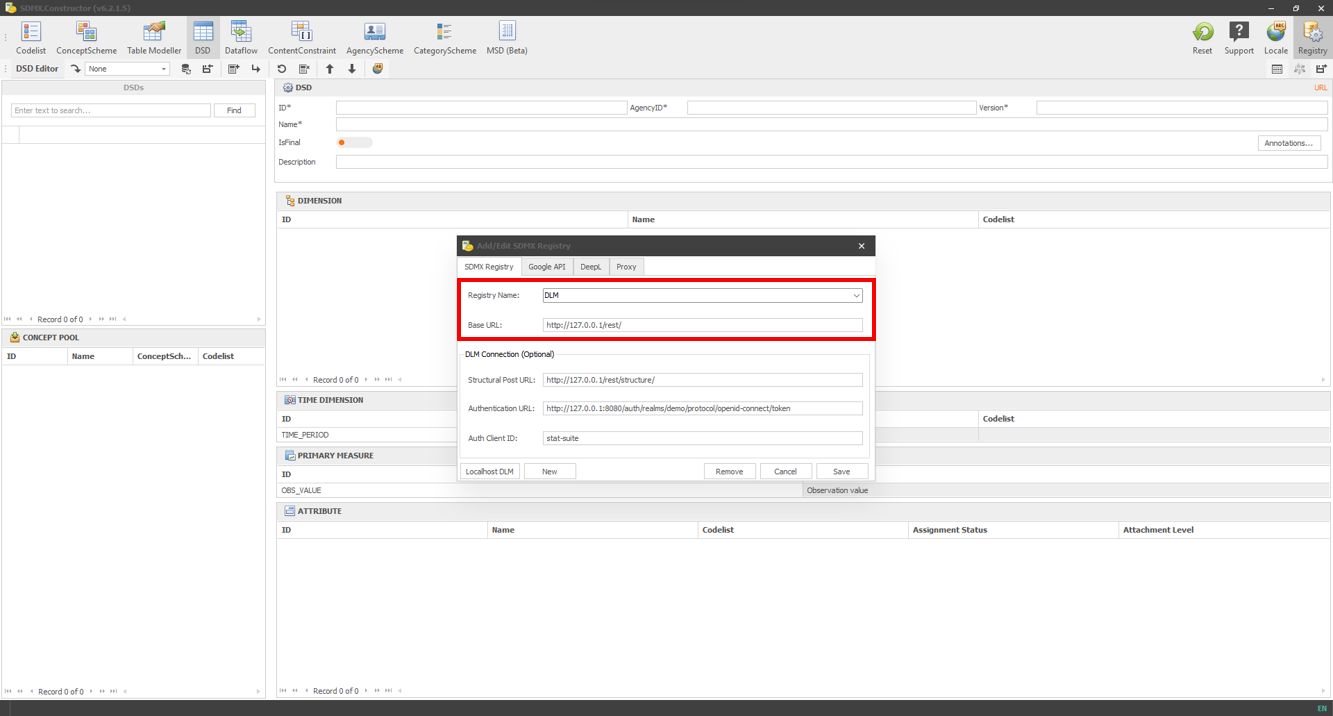
- The default value you can see is as follows.
 Click here to enlarge the image
- Change the default values for Registry Name and Base URL. For Registry Name, you can choose a name of your choice. For example, Registry Name could be DLM, and for the Base URL, the localhost configuration is already specified (by default, it will be http://127.0.0.1/rest/).
 Click here to enlarge the image
- Clicking on Save will show the message shown below. Click on OK.
 Click here to enlarge the image
- Once the Registry is set, select it from the ‘Load from registry’ option, as shown below.
 Click here to enlarge the image
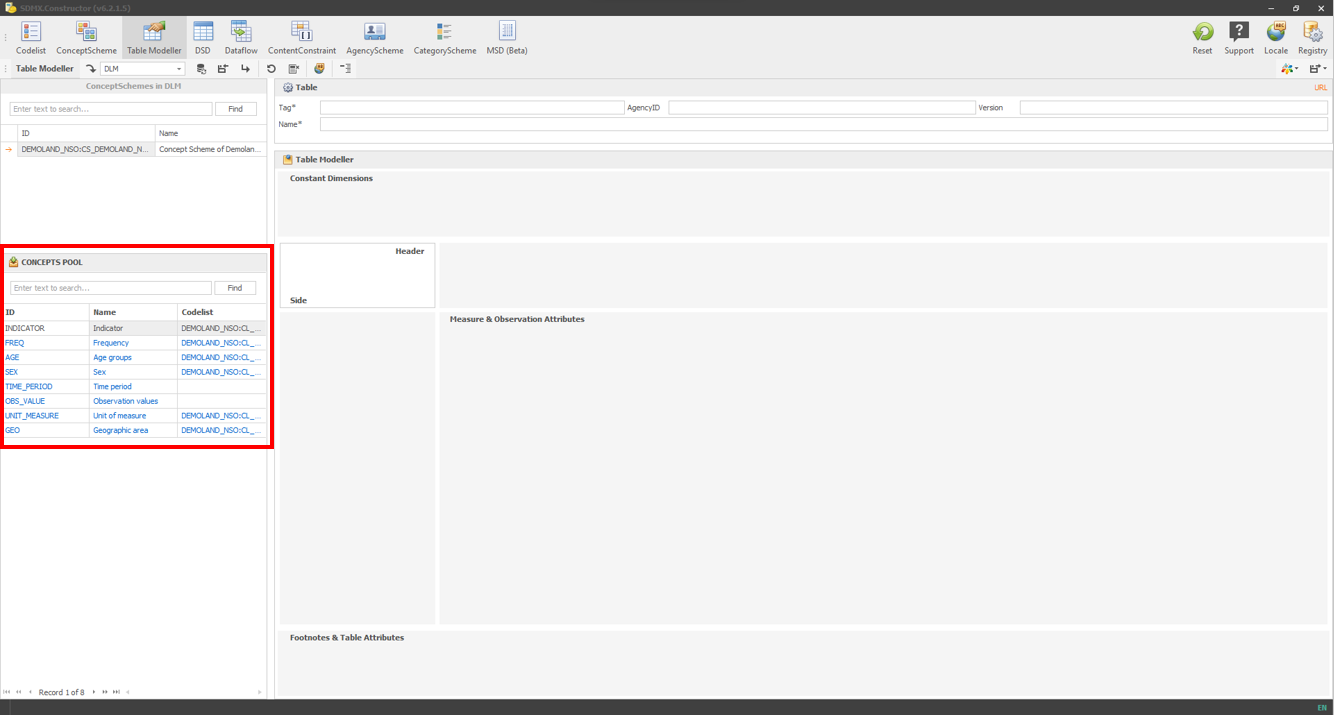
Doing this syncs the artefacts. For instance, you can see the dataflows in SDMX Constructor populated from the DLM. However, pushing any new entry (in this case, let’s say, a new dataflow) to DLM would require the credentials for the DLM.
- From the concepts obtained from the DLM, as shown below, let’s create a new data flow.
 Click here to enlarge the image
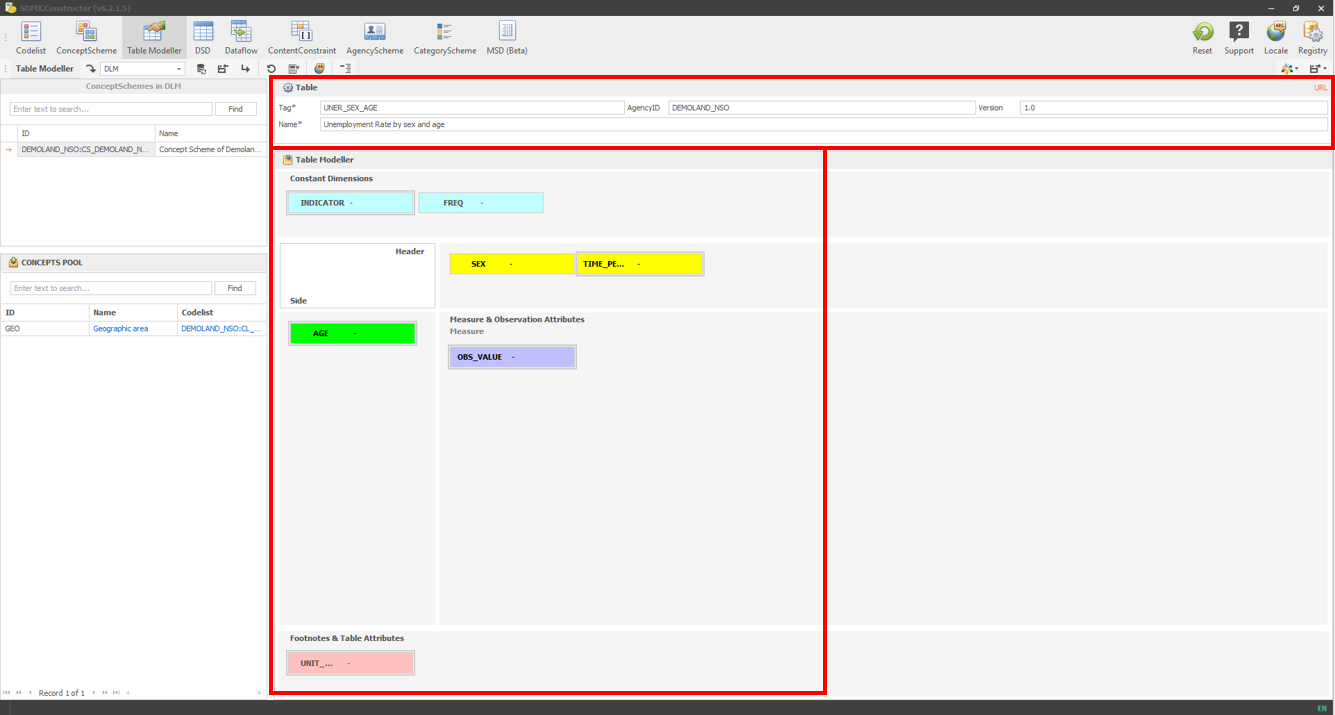
- Move the concepts around and enter table details as shown below.
 Click here to enlarge the image
- Apply the content constraints as shown below.
 Click here to enlarge the image
- Then click on the Push to DLM button, as shown below.
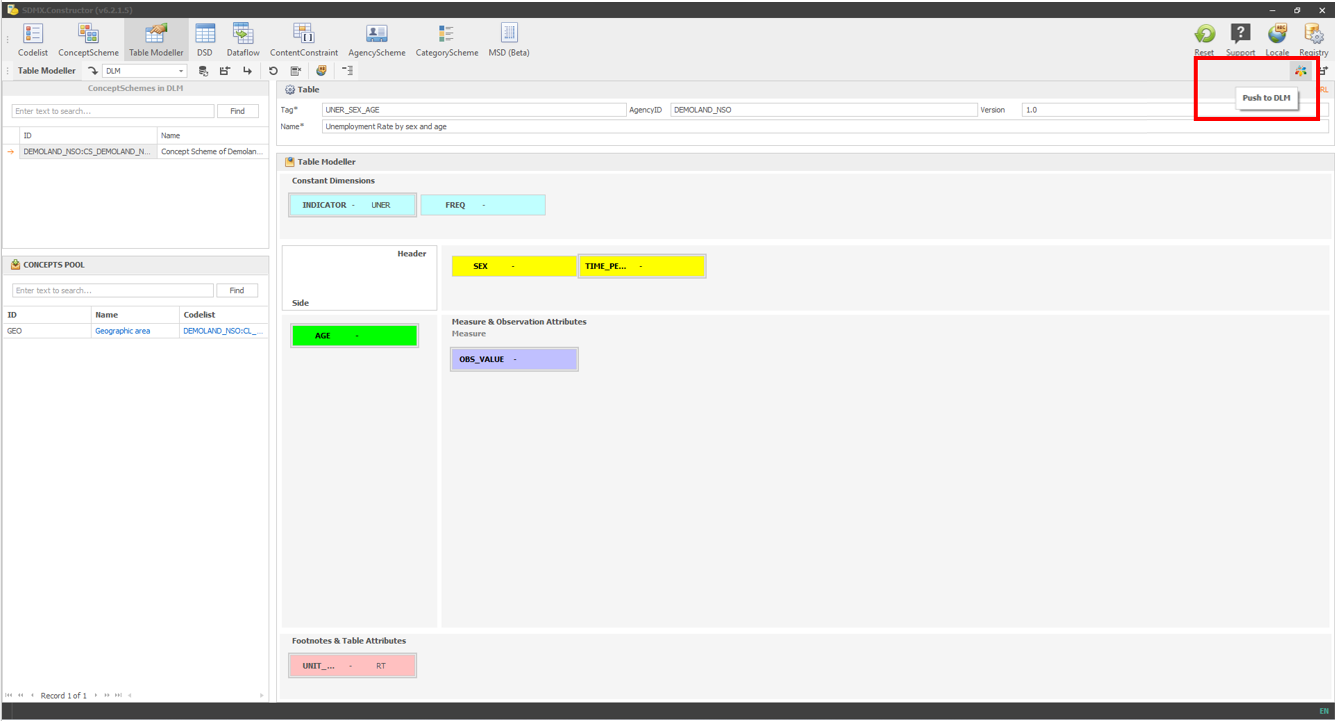 Click here to enlarge the image
- Select ‘Push without descendants’.
 Click here to enlarge the image
- After entering the credentials for the DLM, push, and you will see a message like the one below.
 Click here to enlarge the image
- After you have pressed the Continue button, you will see the following. The message mentions what has changed and what has not. In this case, it notes no DSD change, but one data flow and a content constraint have been created.
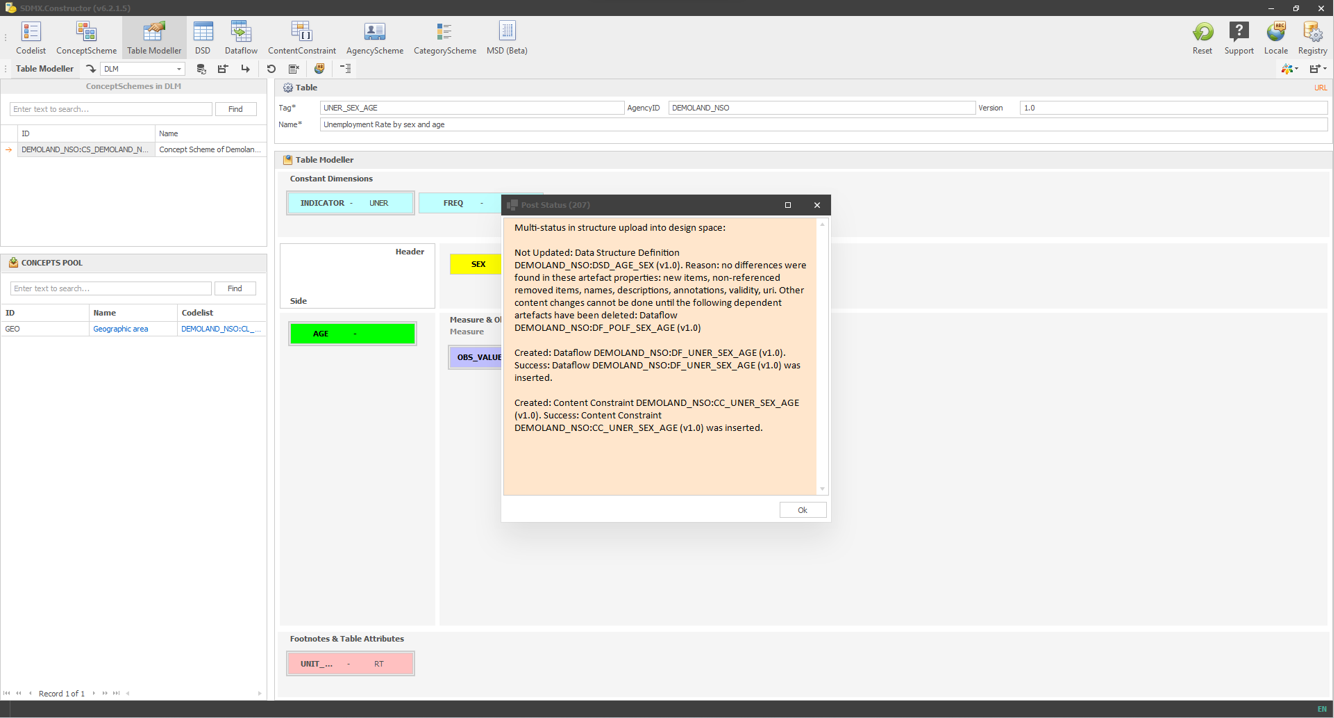 Click here to enlarge the image
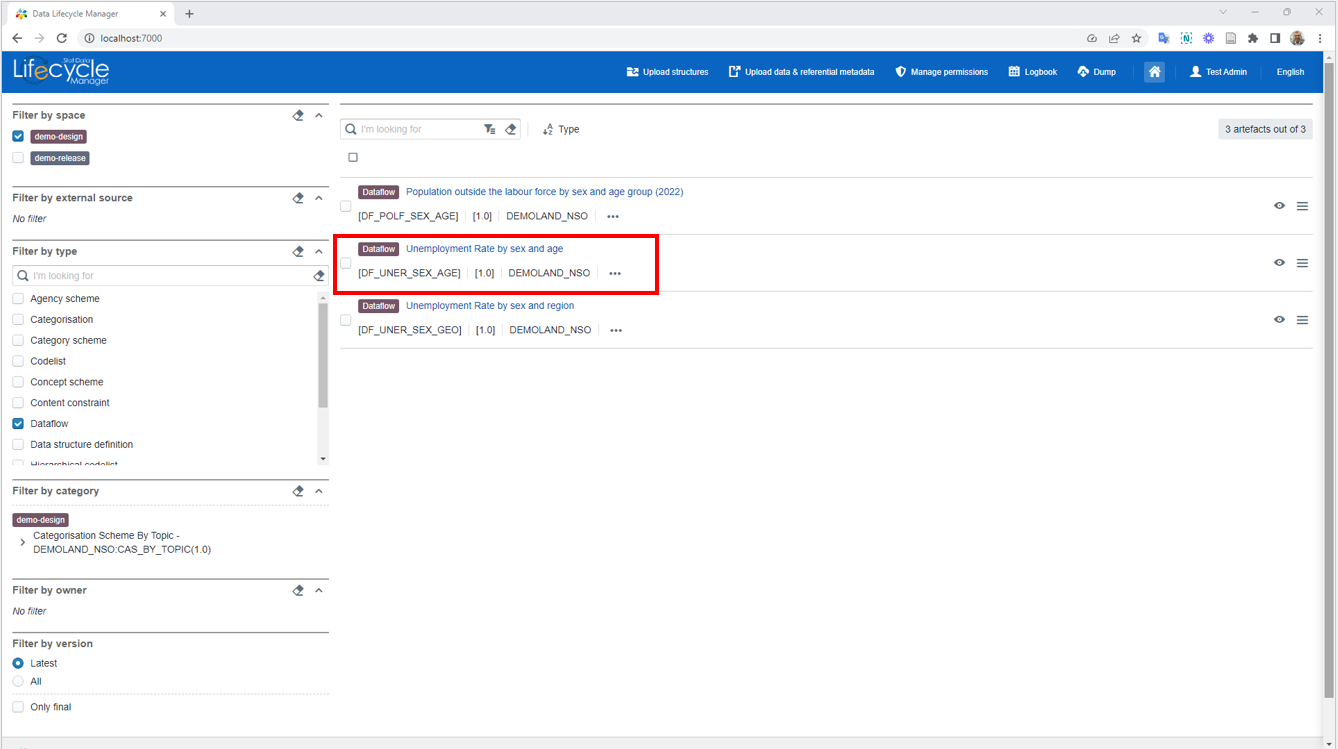
- Click on OK and go to the DLM. In the DLM, clicking on the dataflow would show the additional dataflow added directly through the SDMX Constructor to the DLM, as shown below.