4.5 Creating ConceptScheme & Codelist
In the context of SDMX, a ConceptScheme refers to a structured representation of concepts used to classify and describe statistical data and metadata. It serves as a framework or taxonomy for organising and categorising these concepts within the SDMX framework.
A ConceptScheme provides a standardised and harmonised way of defining relevant concepts to a particular domain or statistical subject area. It helps ensure consistency in interpreting and using these concepts across different datasets and statistical systems.
When Concepts represent a statistical categorical variable (or qualitative variable), they can take on one of a limited and fixed number of possible values. In such a case, the concept is “enumerated”, and its representation is given by a Codelist that contains the valid values that the concept can take on and its meaning. For example, in a dataset on population demographics, the code list for the concept of sex might include codes such as Men, Women, and Both Sexes (Total).
The “one by one” approach.
We can create a Concept Scheme in SDMX Consctuctor by following the steps described below. This section describes the one-by-one entry approach. The subsequent section illustrates the bulk load feature in detail.
- Click on the ConceptScheme button in the Editor menu. Then click the ‘Add New Concept’ button in the Editor Ribbon menu, as shown below.
 Click here to enlarge the image
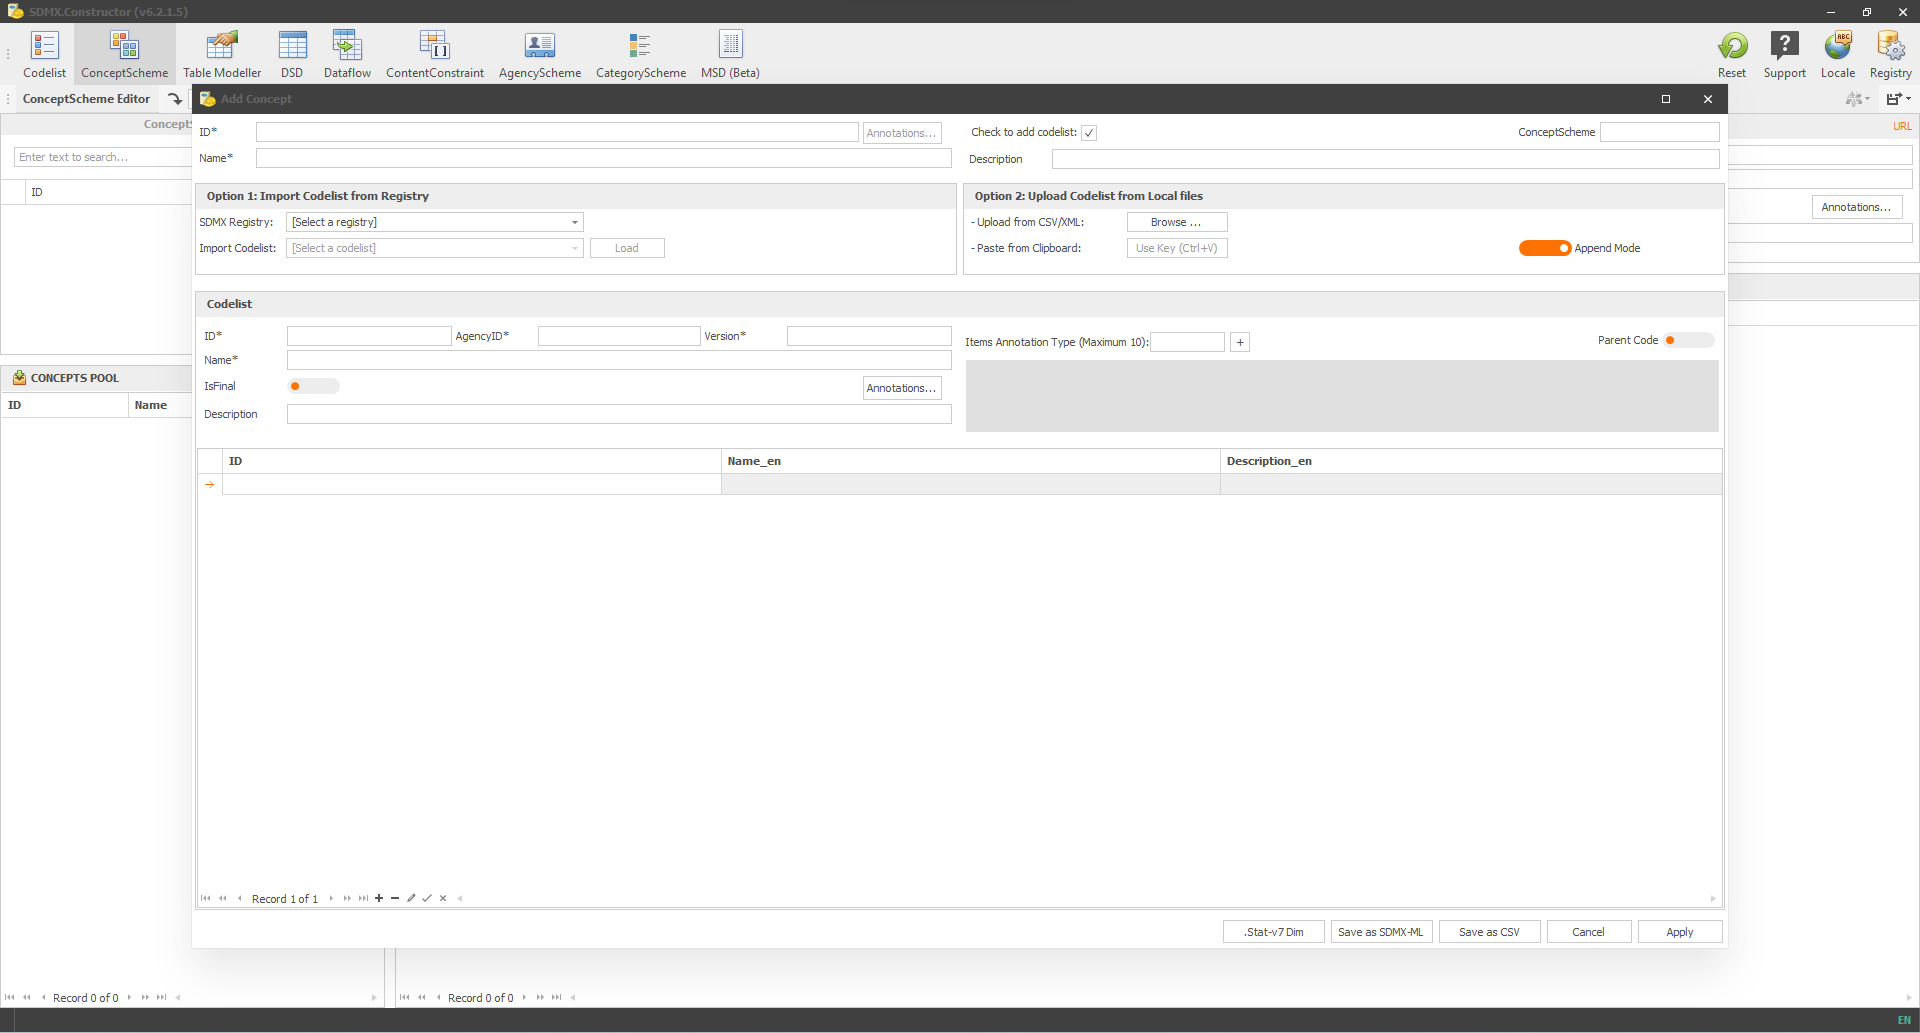
- The resulting pop-up window would look like the following.
 Click here to enlarge the image
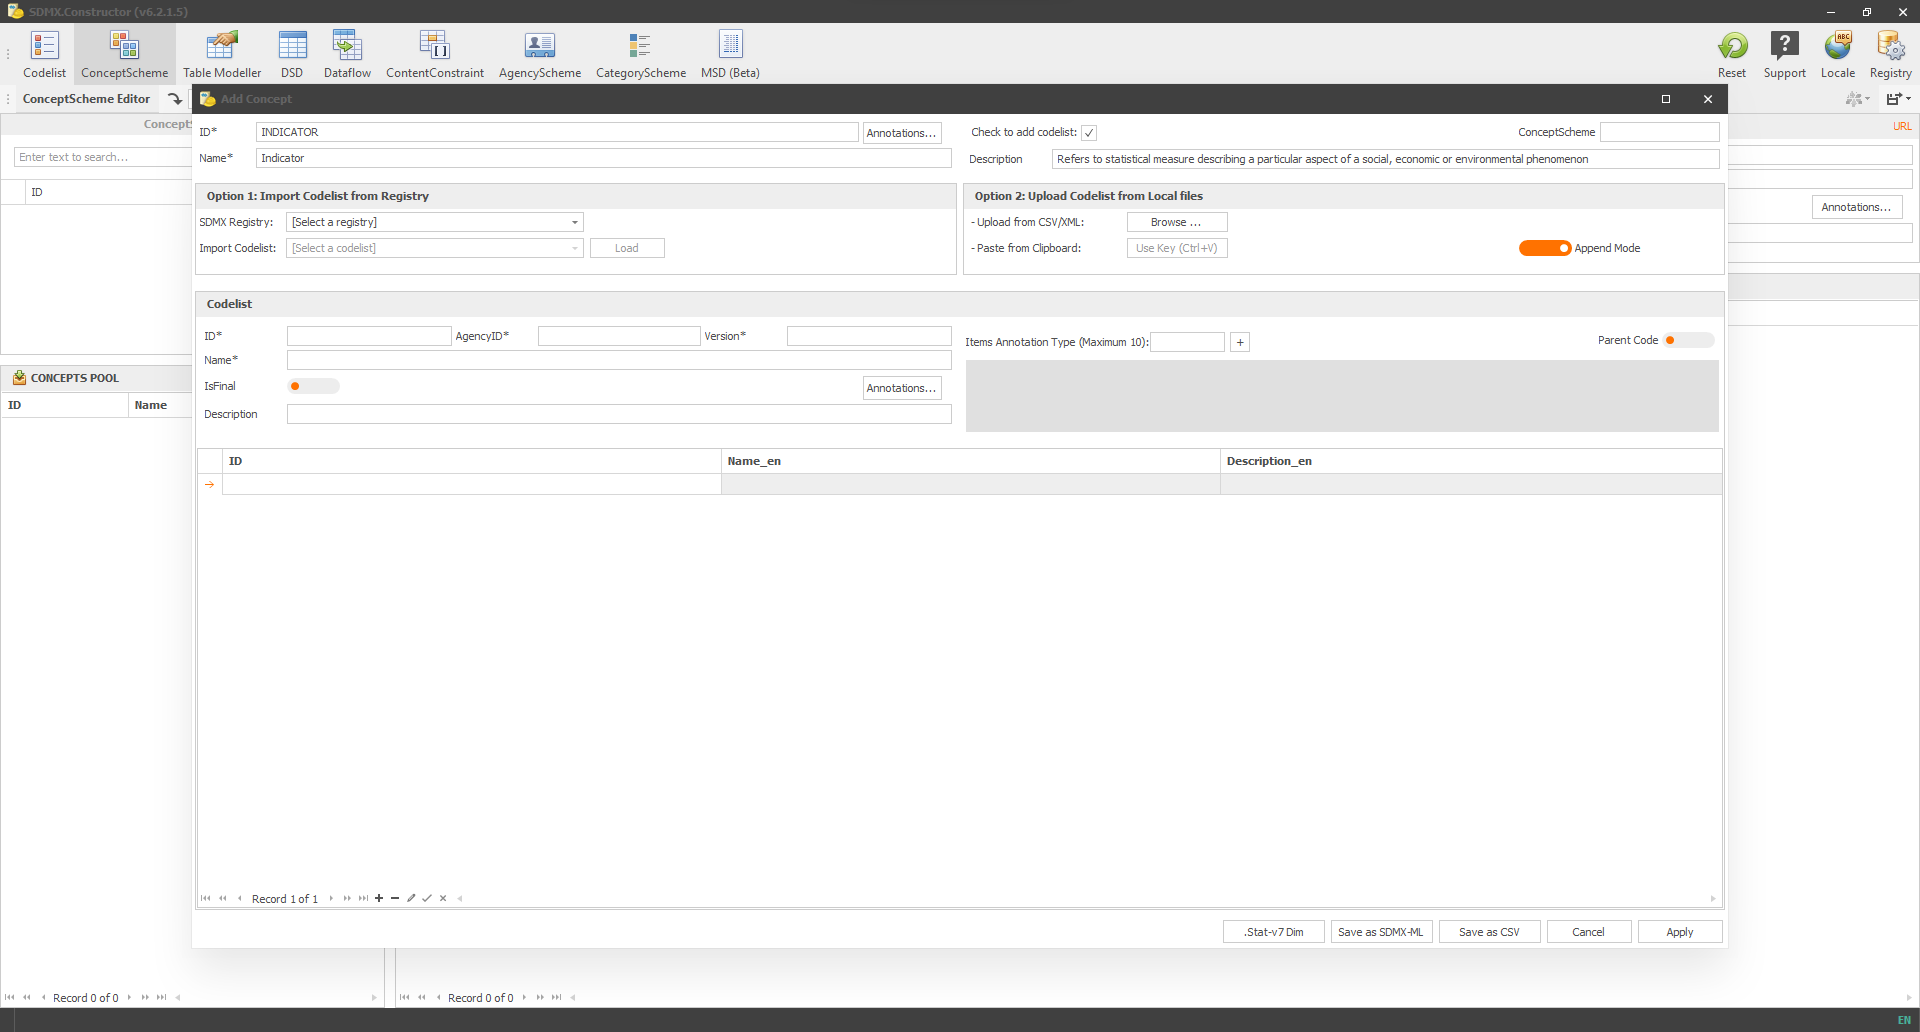
- Provide the details as per the template. As an example, we choose the concept of ‘indicator’. Hence we could use ID = INDICATOR and Name = Indicator. For Description, we could use ‘Refers to statistical measure describing a particular aspect of a social, economic or environmental phenomenon’ as shown below. We could keep the checkmark to add the code list (this would allow us to add the code list in the same interface).
 Click here to enlarge the image
Now, we have three options to add the code list. Option 1 is to ‘Import Codelist from Registry’, Option 2 is to ‘Upload Codelist from Local files’, and below these options, as you can see in the image below, is the option to create a code list from scratch.
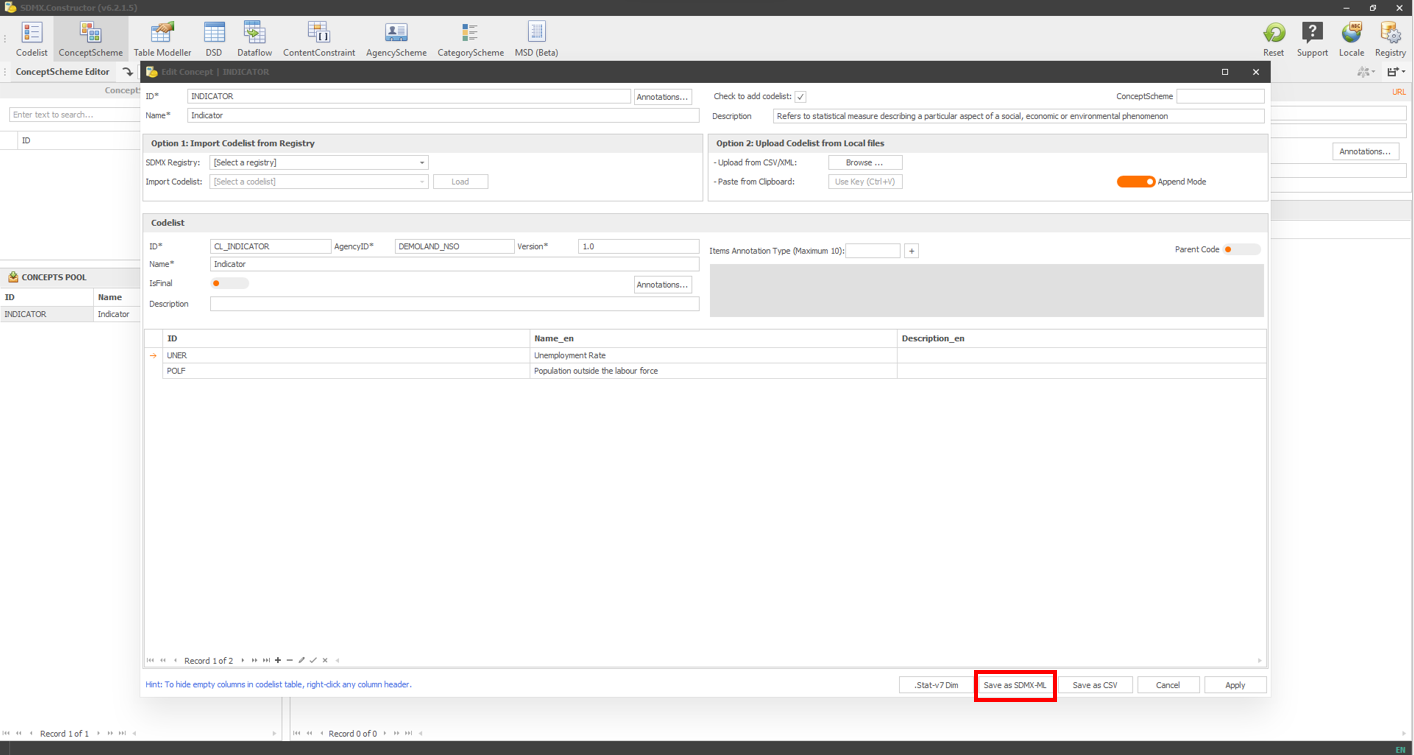
We create the code list from scratch in the next step. We could use ID = CL_INDICATOR, Agency ID = DEMOLAND_NSO, Version = 1.0 and Name = Indicator
We add two items to the code list for illustration purposes. ID = UNER, Name: Unemployment Rate and ID = POLF, Name = Population outside the labour force in two rows. Use the Append or + button to add multiple rows, as highlighted below.
 Click here to enlarge the image
- Click the Apply button (as highlighted below).
 Click here to enlarge the image
- After clicking the Apply button, we will see the concept added in the CONCEPT POOL pane, as shown below.
 Click here to enlarge the image
- Double-clicking on the concept scheme will open up the pop-up window, as shown below. This time, clicking ‘Save as SDMX - ML’ (other options are also available), as shown below, will start the standard process of saving the artefact in a local folder for later use.
 Click here to enlarge the image
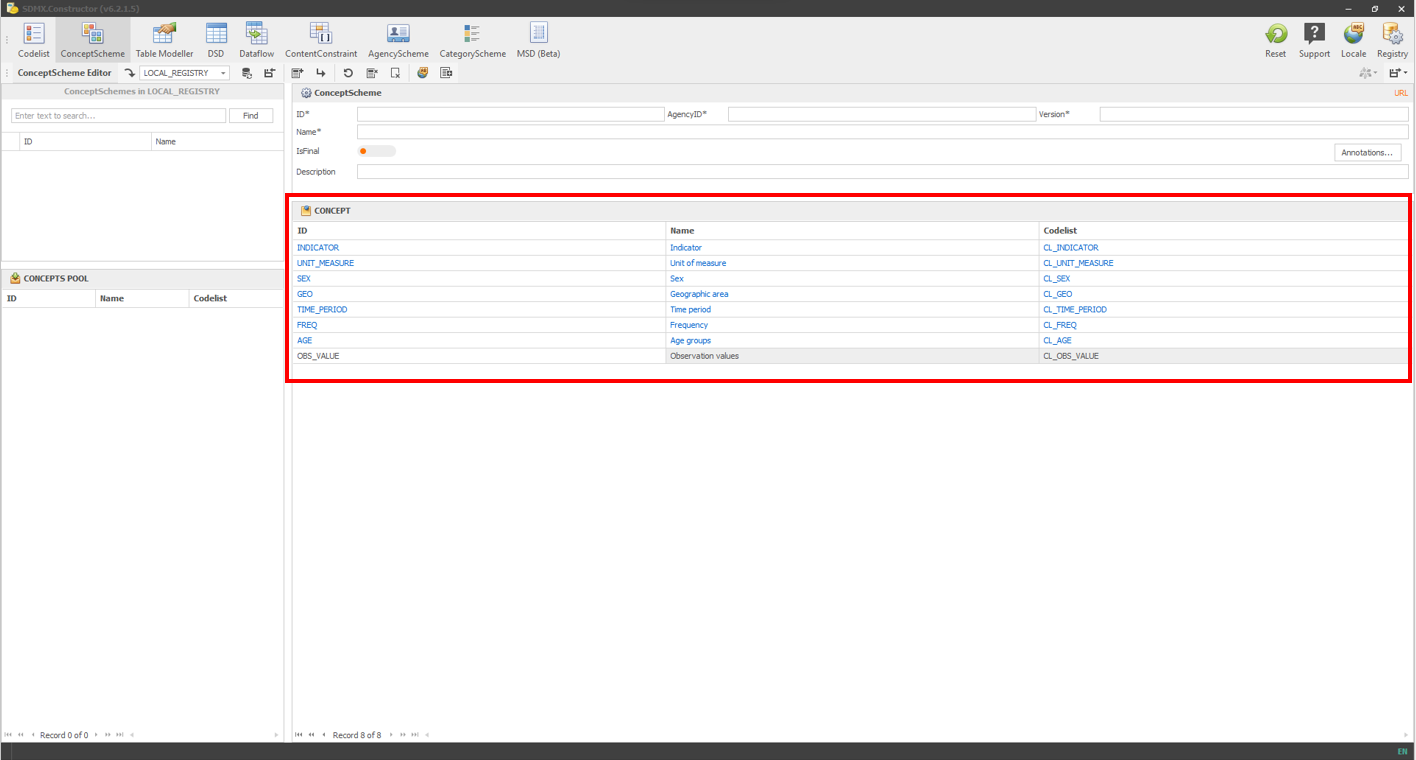
- After creating all the concepts and related code lists (based on the Table 4.1 and 4.2), you can see all the concepts in the CONCEPT POOL, as shown below.
 Click here to enlarge the image
- Move all the concepts from the CONCEPT POOL to the CONCEPT pane by selecting all (ctrl + a), then dragging and dropping. After the move, it would look like the following.
 Click here to enlarge the image
- After moving the concepts, enter the details: (ID: CS_DEMOLAND_NSO, AgencyID: DEMOLAND_NSO, Version: 1.0, and Name: Concept Scheme of Demoland NSO) for the ConceptScheme, as shown below, to save the ConceptScheme.
 Click here to enlarge the image
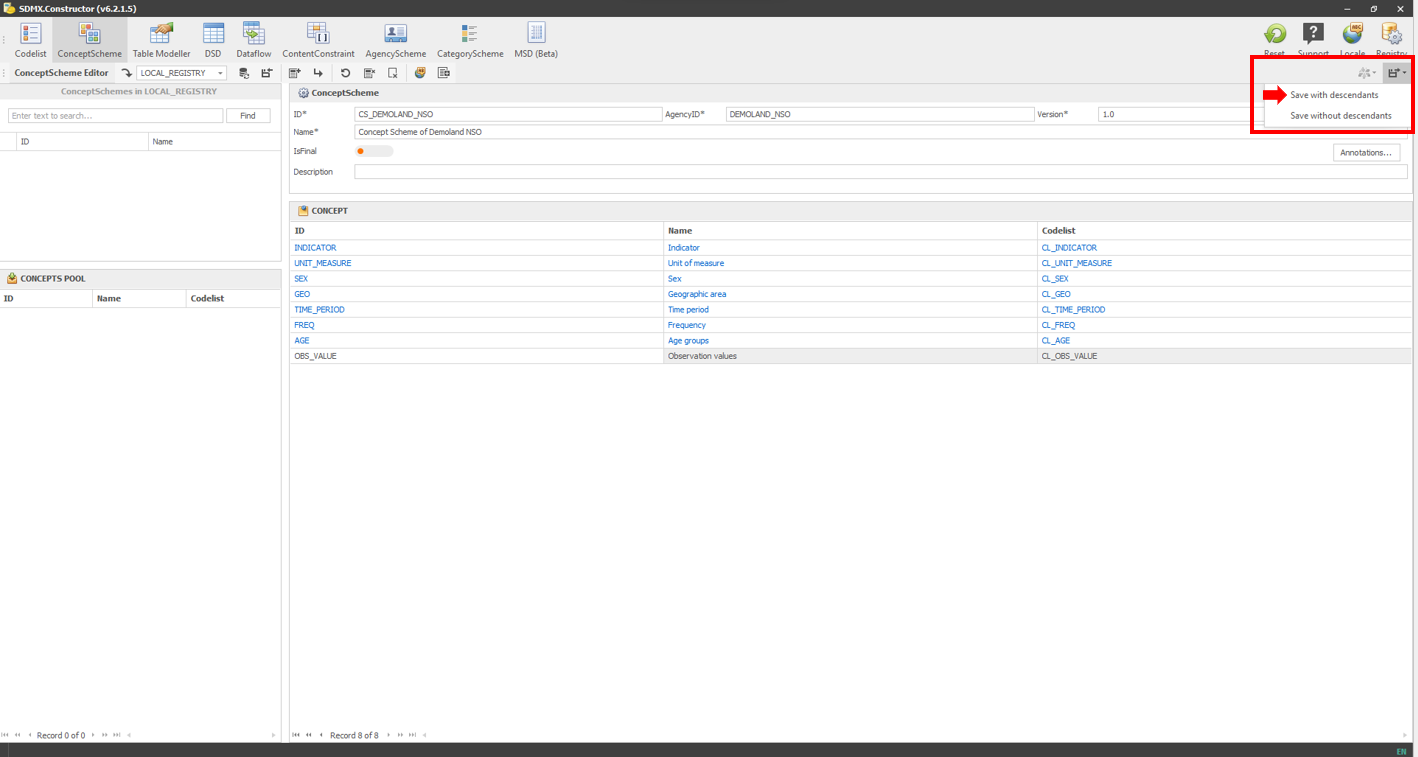
- Then, click the ‘Save with descendants’ from the save option as shown below. This option, ‘Save with descendants,’ will save the concept scheme with the code list.
 Click here to enlarge the image
- A pop-up message will ask to save the XML file in the folder (LOCAL_REGISTRY) we created before. Click on Save to save the file.
 Click here to enlarge the image
- After clicking Save, the tool will ask the question to merge files. Select Yes.
 Click here to enlarge the image
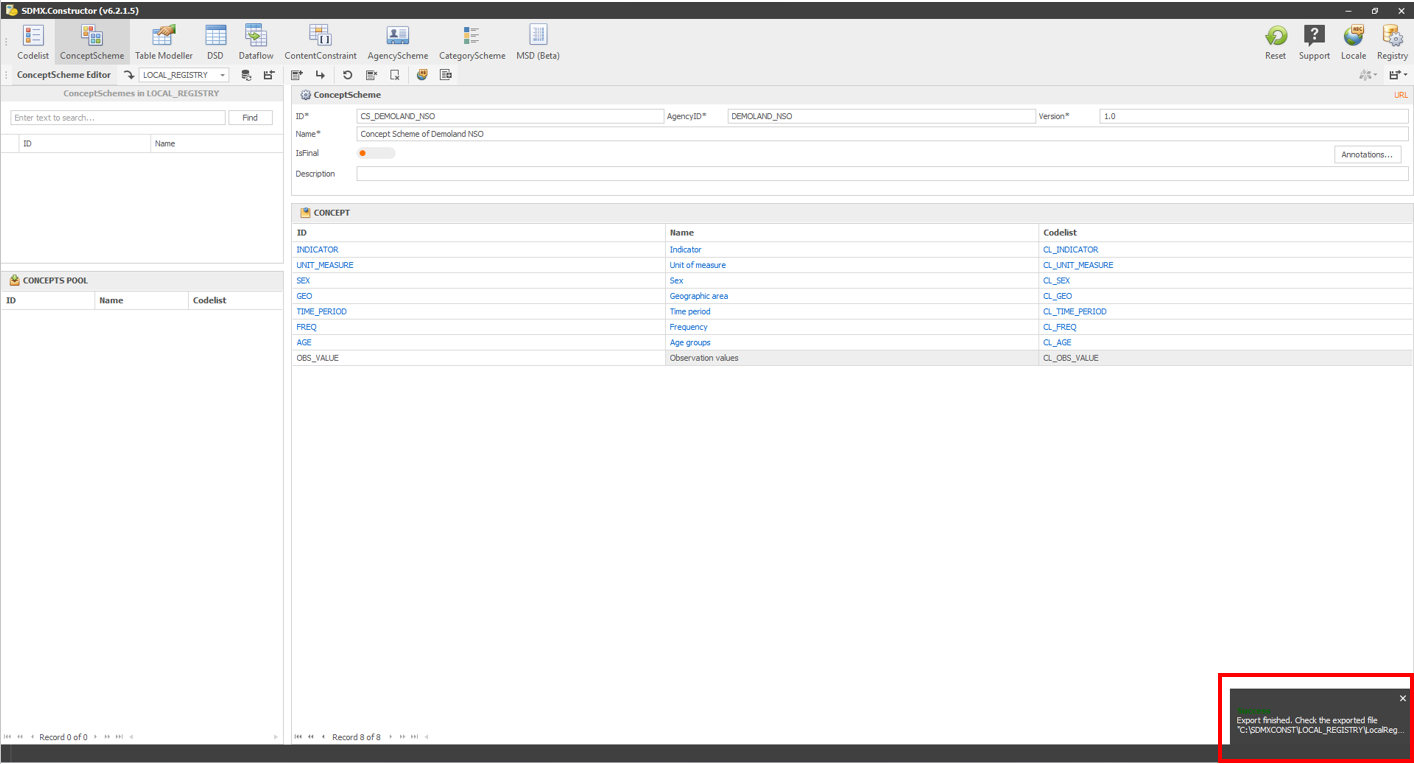
- A confirmation message will appear briefly at the bottom right corner, as shown below.
 Click here to enlarge the image
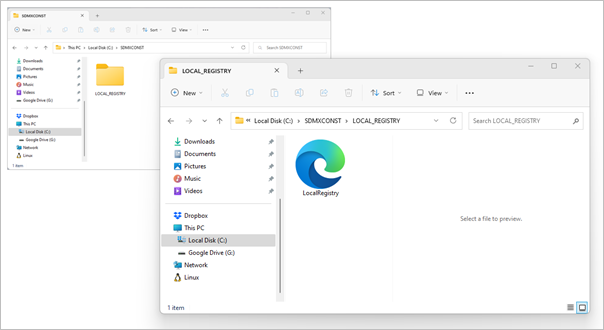
- After that, if you go to the file’s location, you will see the XML file created, as shown below.
 Click here to enlarge the image
The “Bulk load” approach
To create multiple Codelists and ConceptSchemes at once, you can use the SDMX Constructor by following these steps. First, upload the Code List and then the ConceptScheme. By completing these steps in sequence, you can create both artefacts in one go.
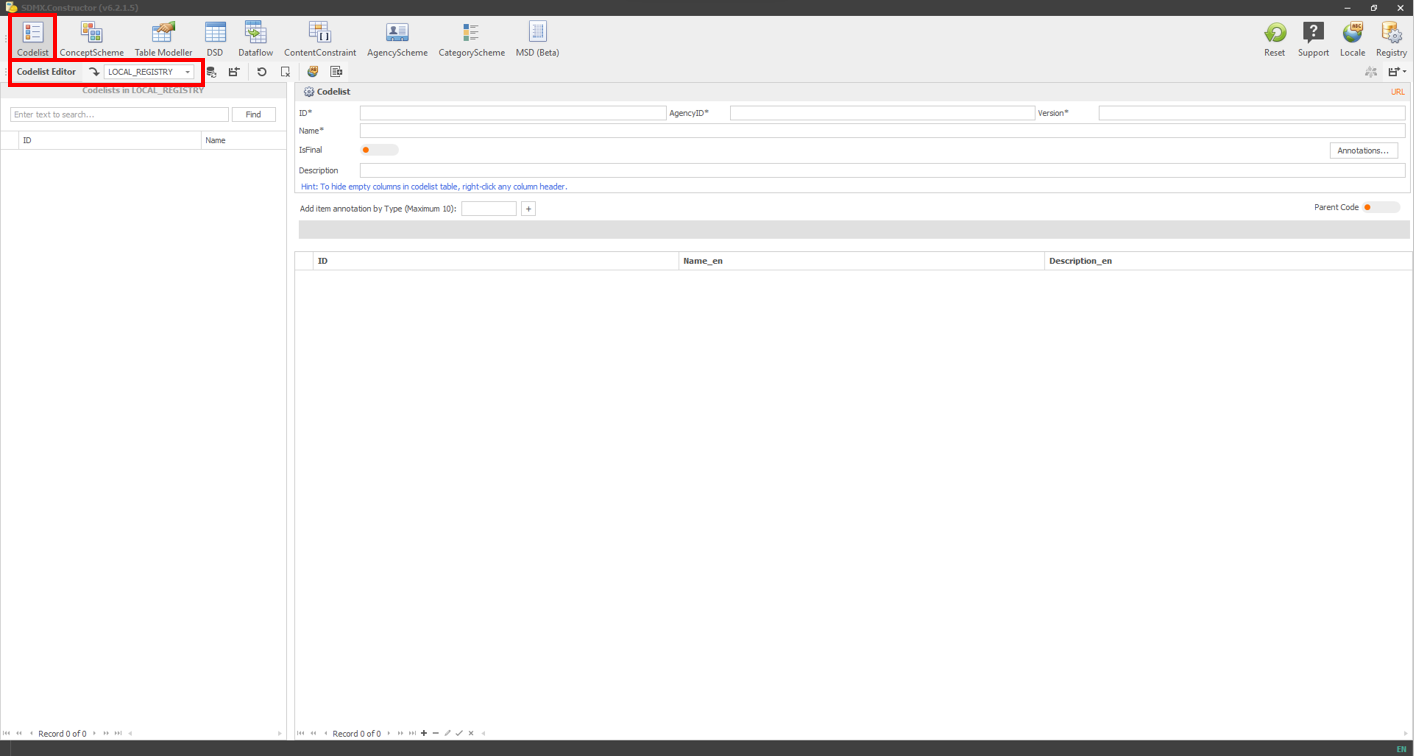
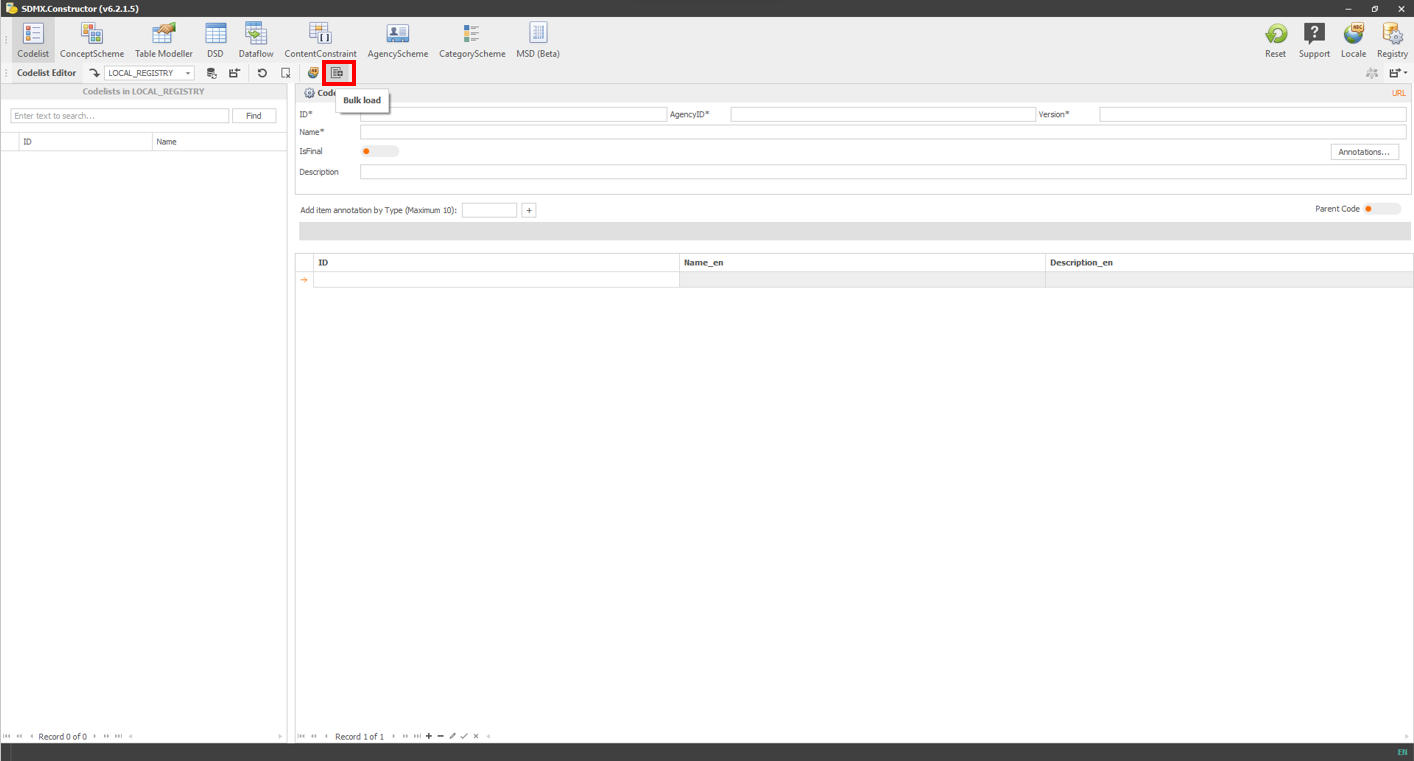
- Click on the Codelist button on top and ensure that the folder we created before, LOCAL_REGISTRY, is selected from the Codelist Editor’s ‘Load from registry’ dropdown option, as shown below.
 Click here to enlarge the image
- Click on the Bulk load button as shown below.
 Click here to enlarge the image
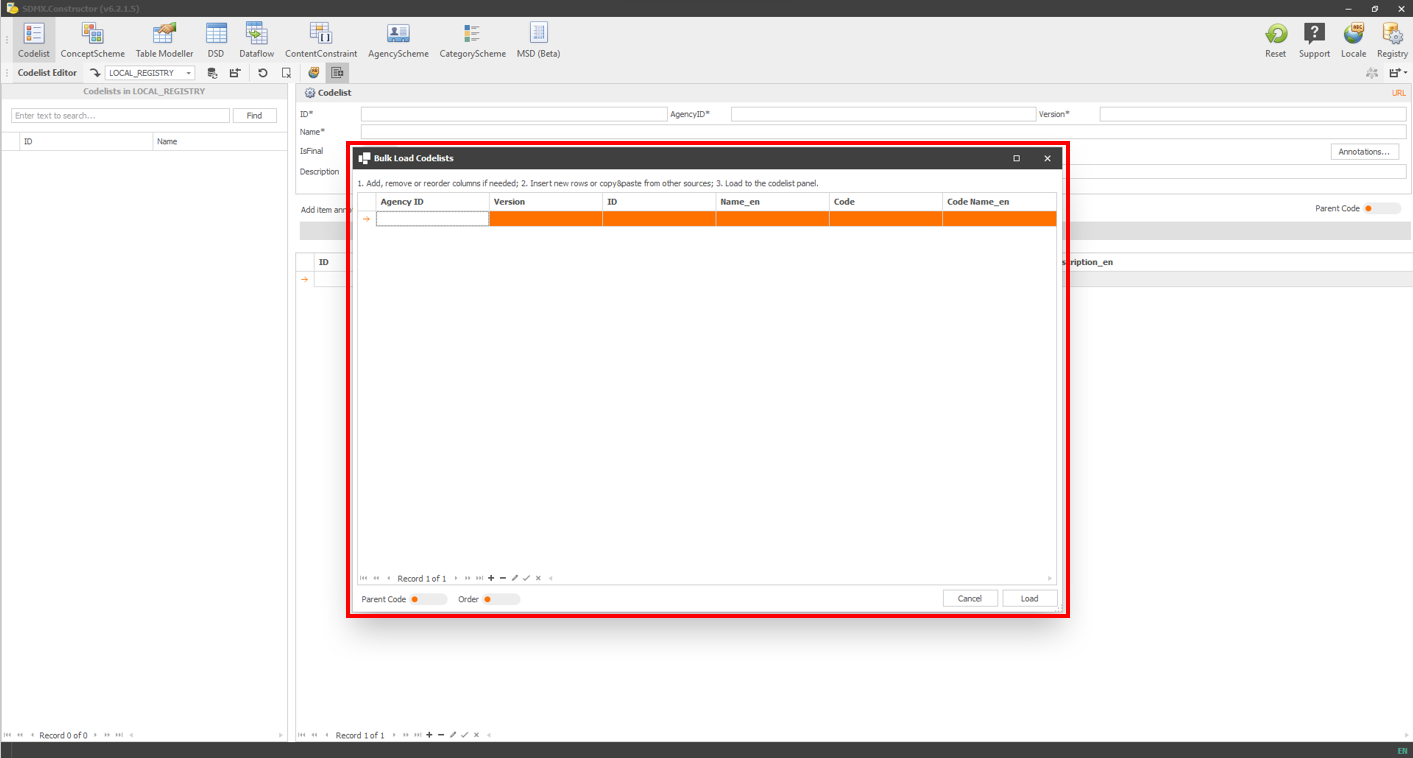
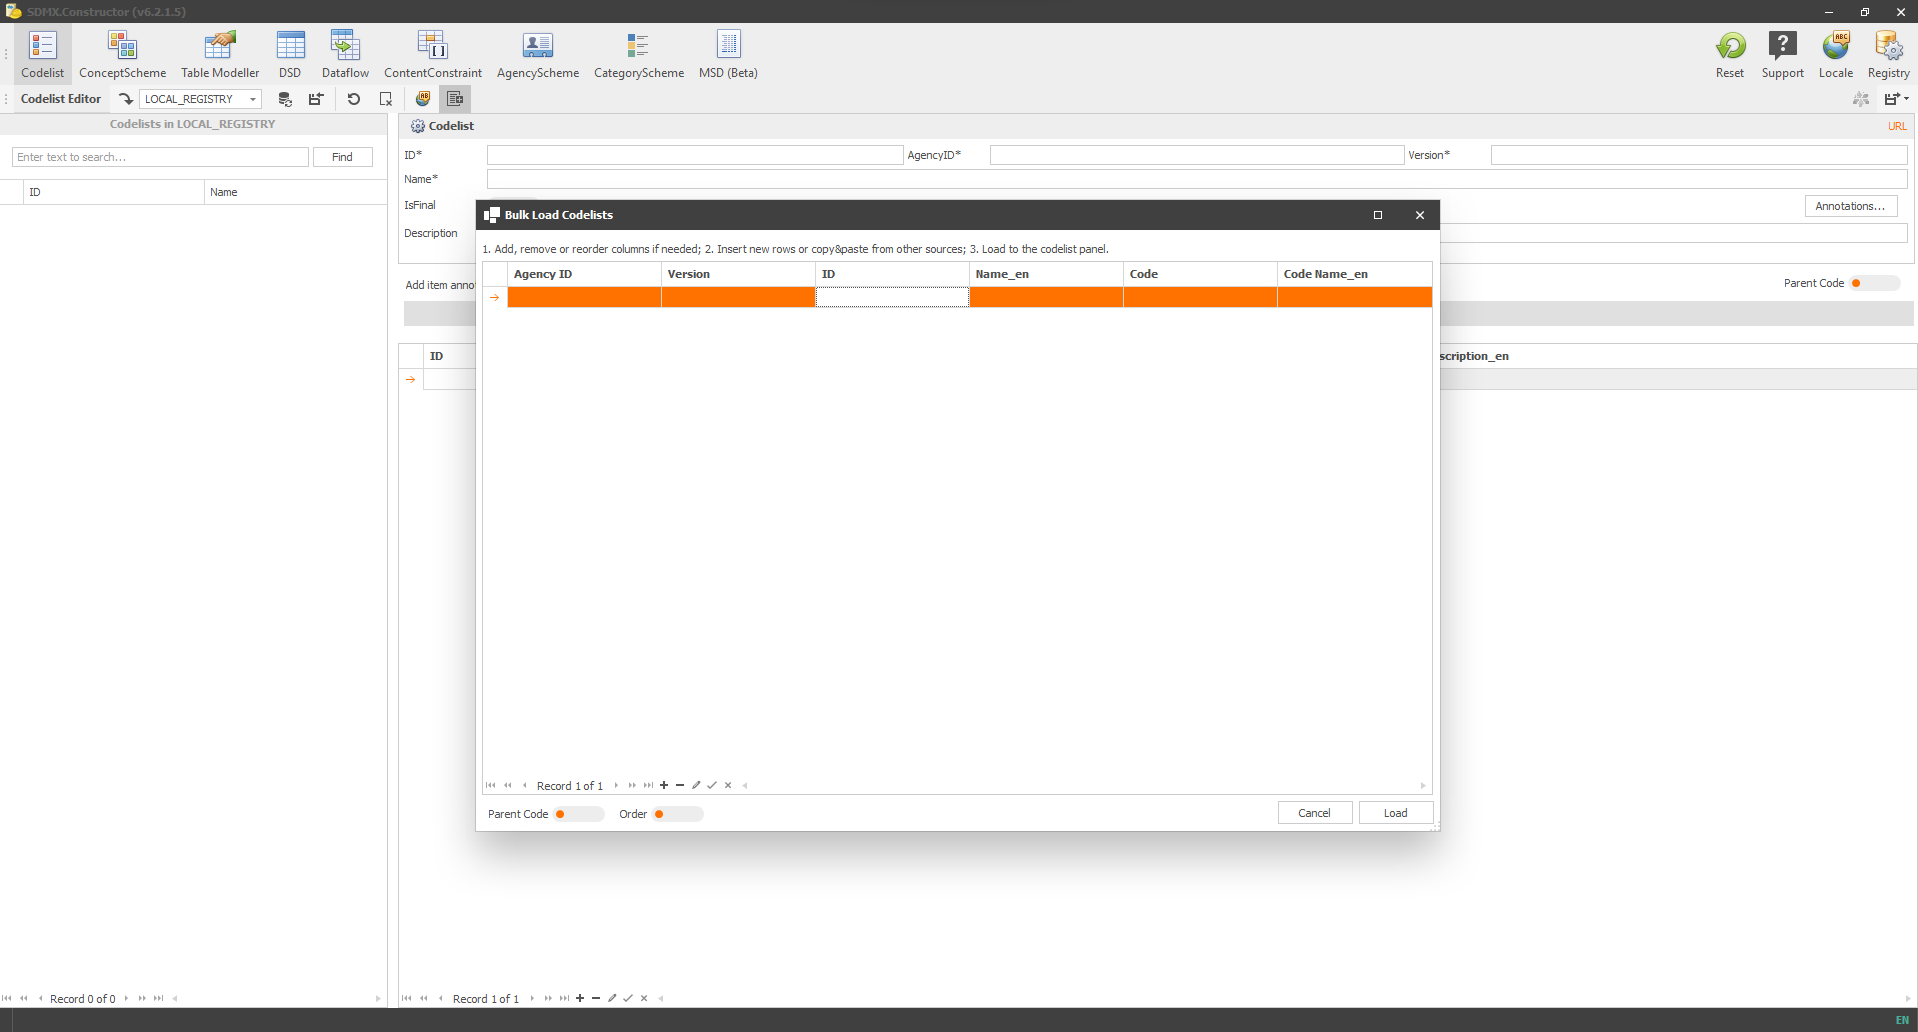
- It will open up a pop-up window, as shown below.
 Click here to enlarge the image
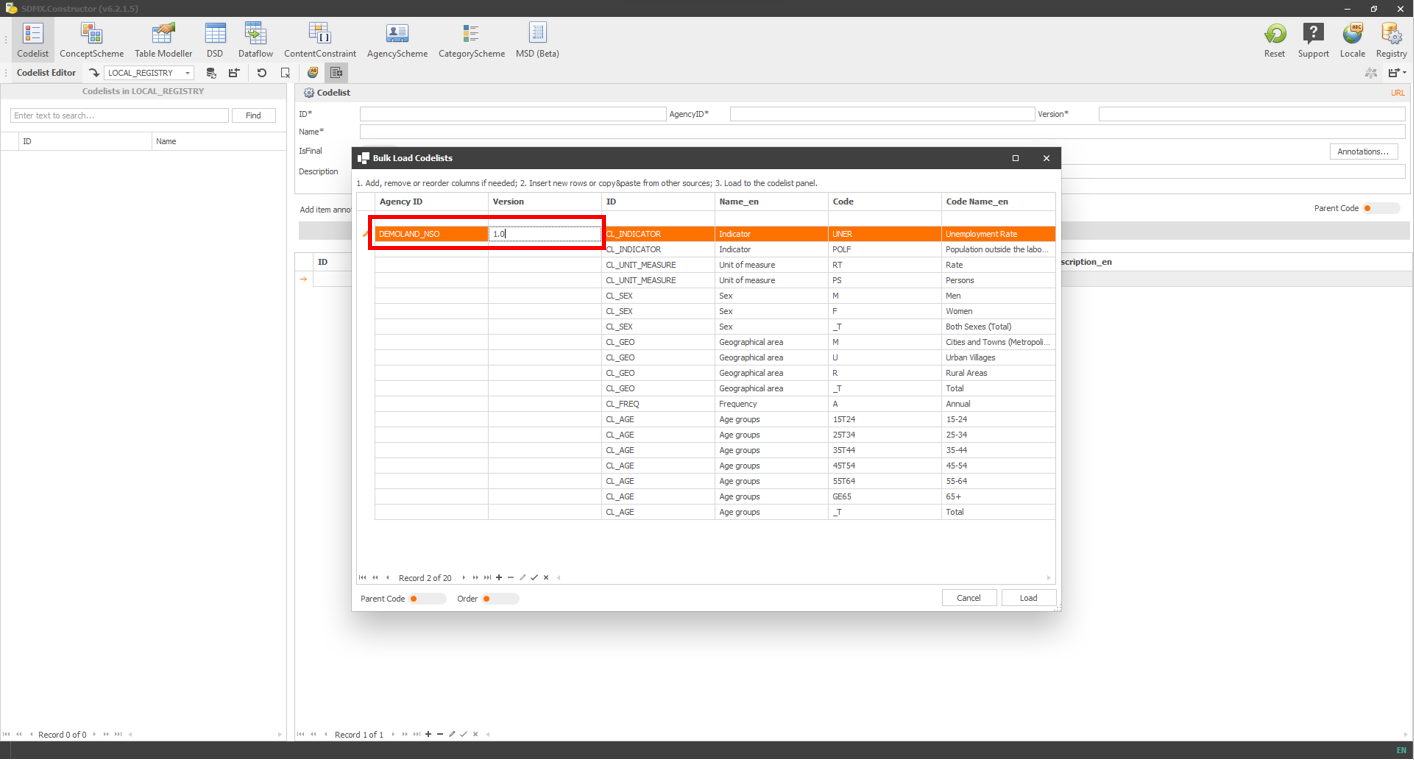
- Copy the Codelist table (Table: 4.4) we prepared before and paste its contents here. Before pasting, remember to click on the ID column (shown in white in the image below). Then, select the entire row (by clicking on the little arrow (pointing at the right) at the beginning of the rows).
 Click here to enlarge the image
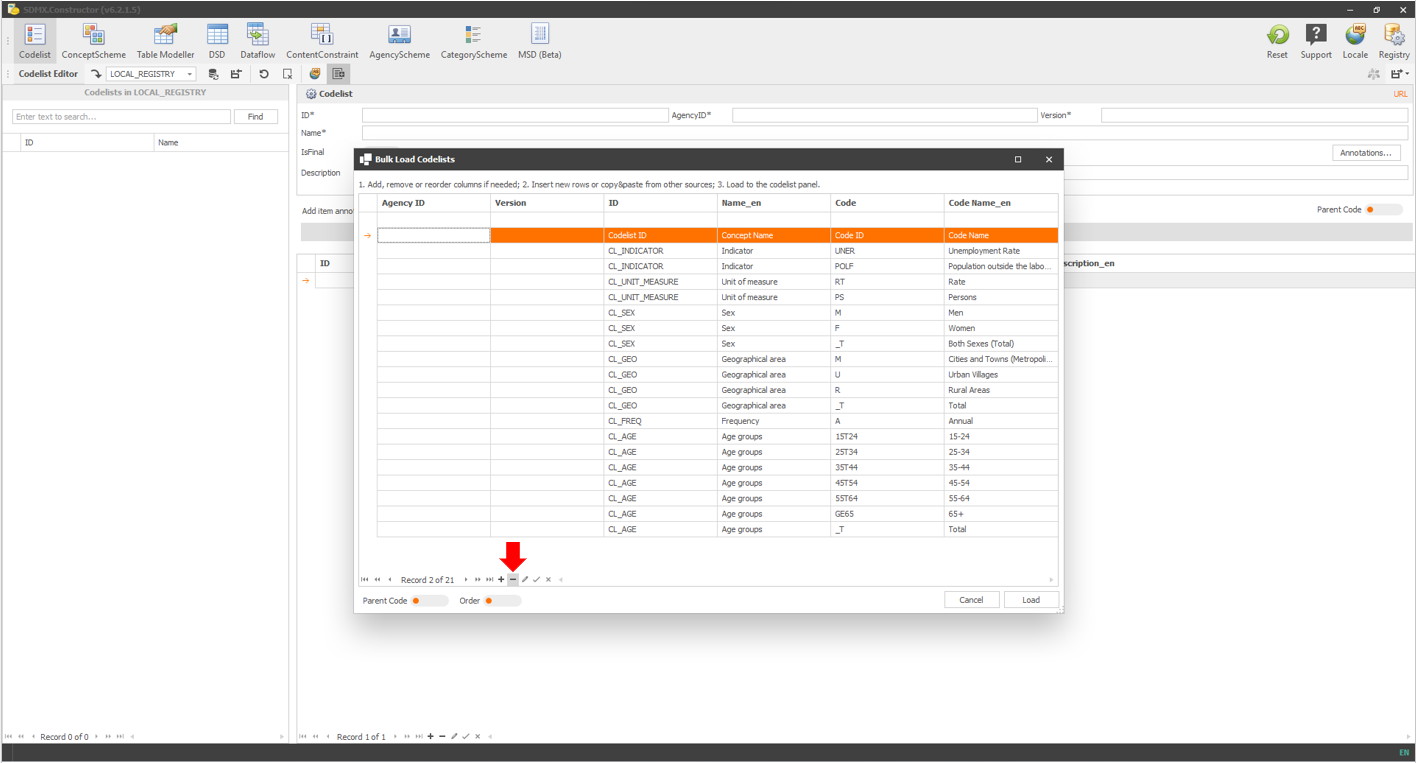
- After pasting, remember to delete the header row. You can do this by selecting the entire row (by clicking again the little arrow pointing at the right at the beginning of the rows) and clicking the button (“-”) below, as indicated by a downward red arrow.
 Click here to enlarge the image
- Enter the Agency ID and Version on the top row as DEMOLAND_NSO and 1.0, respectively, as shown below. If only the top row contains entries (DEMOLAND_NSO and 1.0) and the rest is empty, it implies that the Agency ID and Version are repeated for each row.
 Click here to enlarge the image
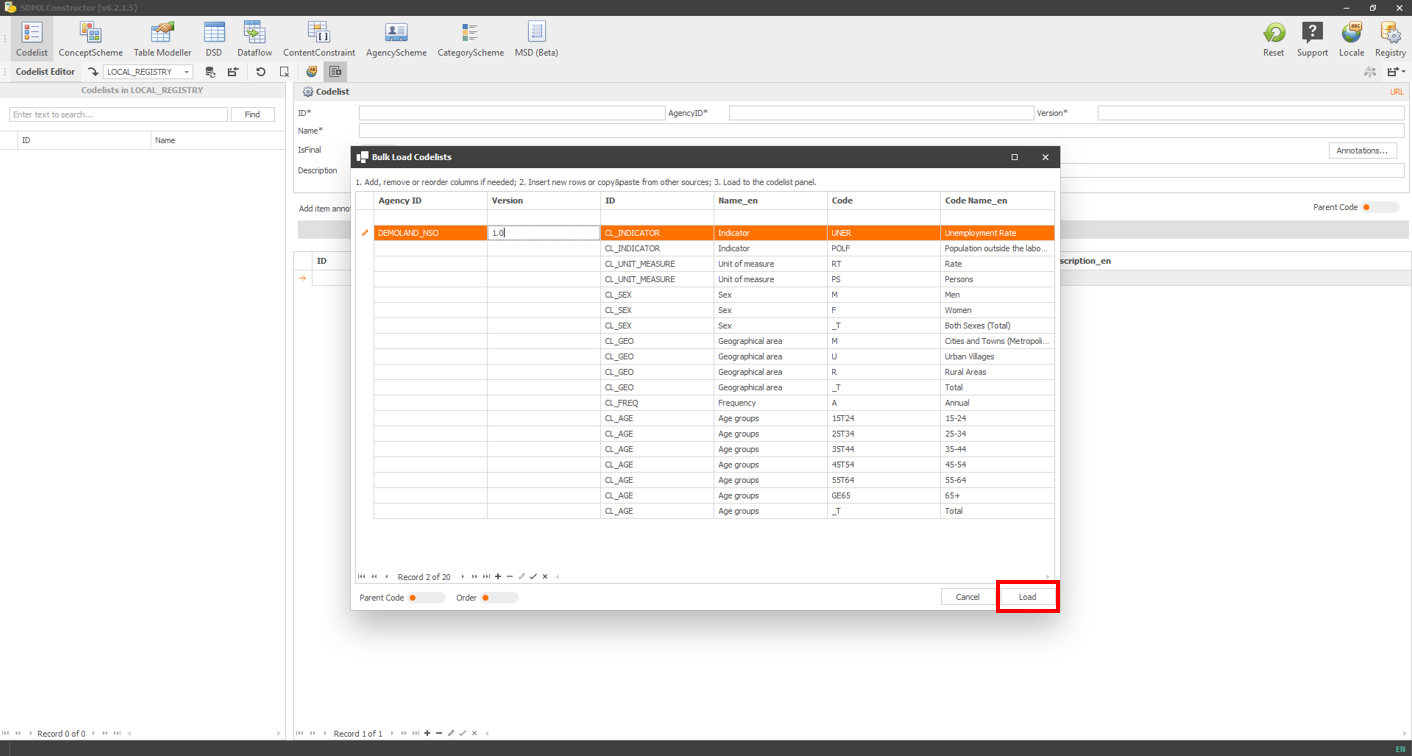
- Click on Load, as shown below.
 Click here to enlarge the image
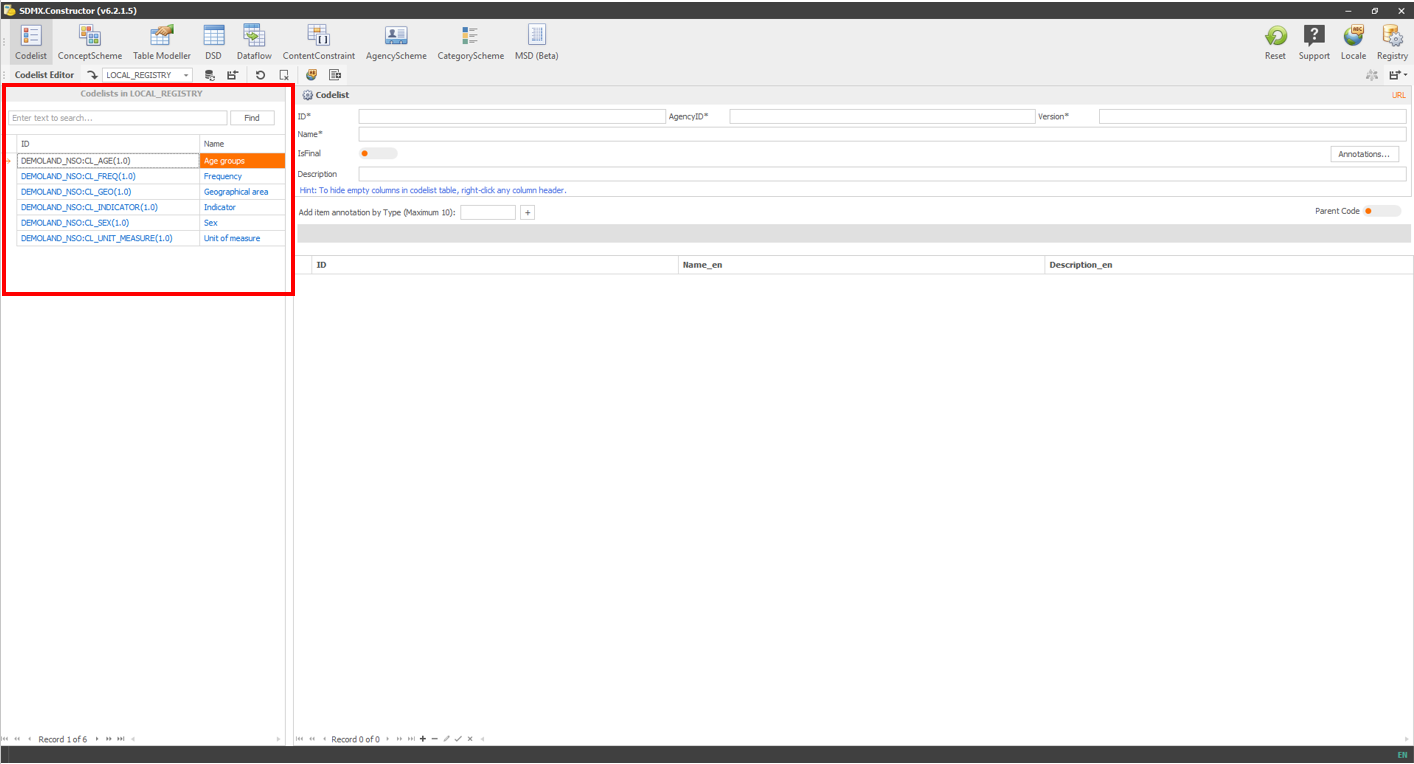
- After the loading, this is how it would look (as shown below).
 Click here to enlarge the image
- Clicking on any item on this list will show the details on the right pane, as shown below.
 Click here to enlarge the image
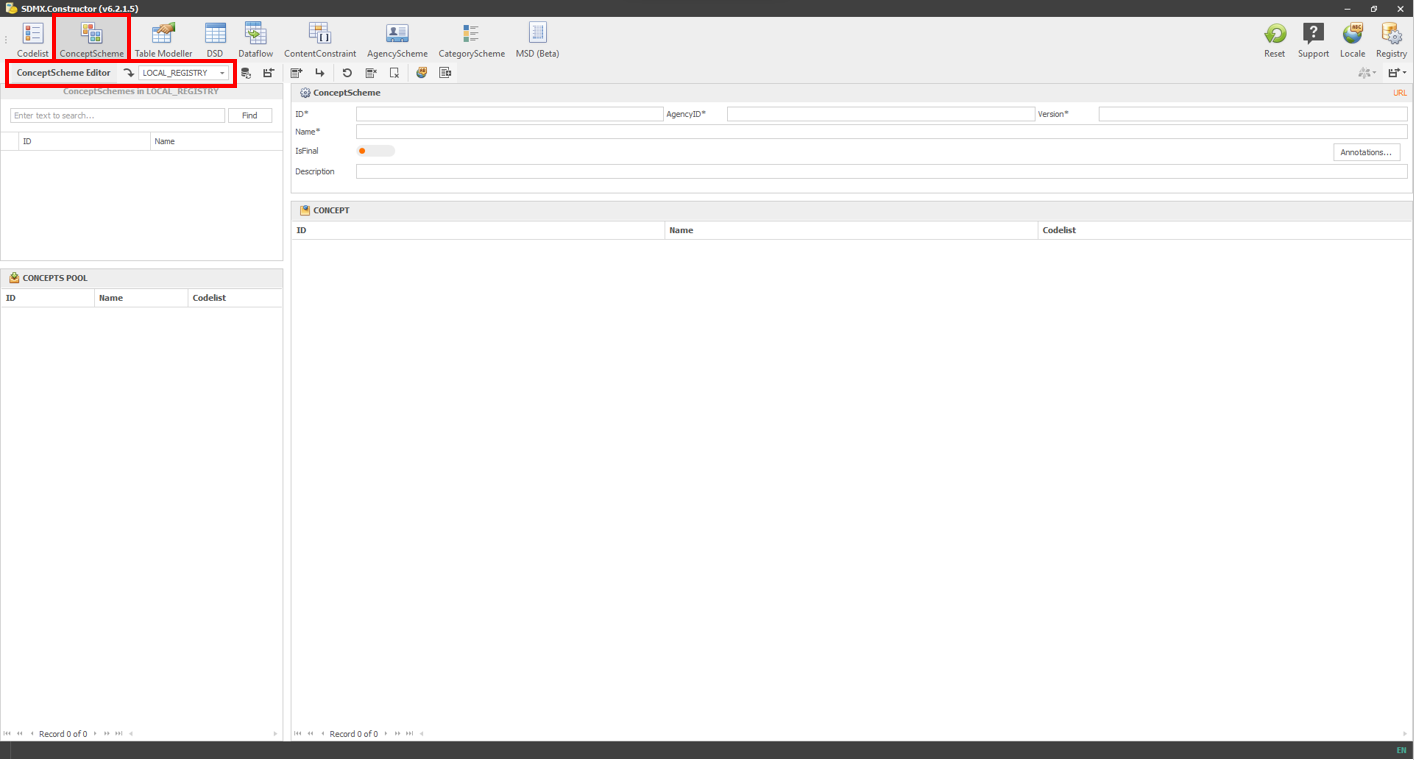
- Click on the ConceptScheme button on top and ensure that the folder we created before, LOCAL_REGISTRY, is selected from the ConceptScheme Editor’s ‘Load from registry’ dropdown option, as shown below.
 Click here to enlarge the image
- Click on the Bulk load button, as shown below.
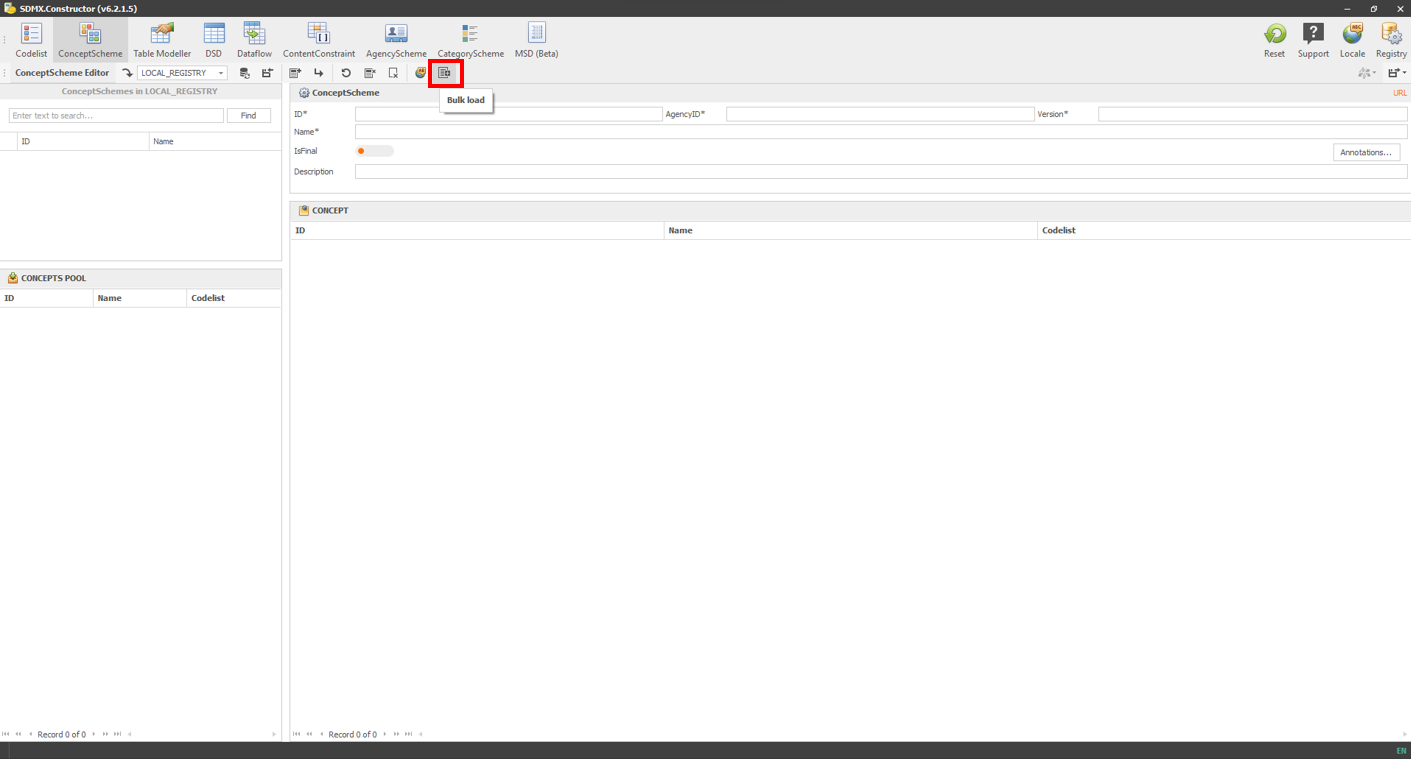 Click here to enlarge the image
- It will open up a pop-up window, as shown below.
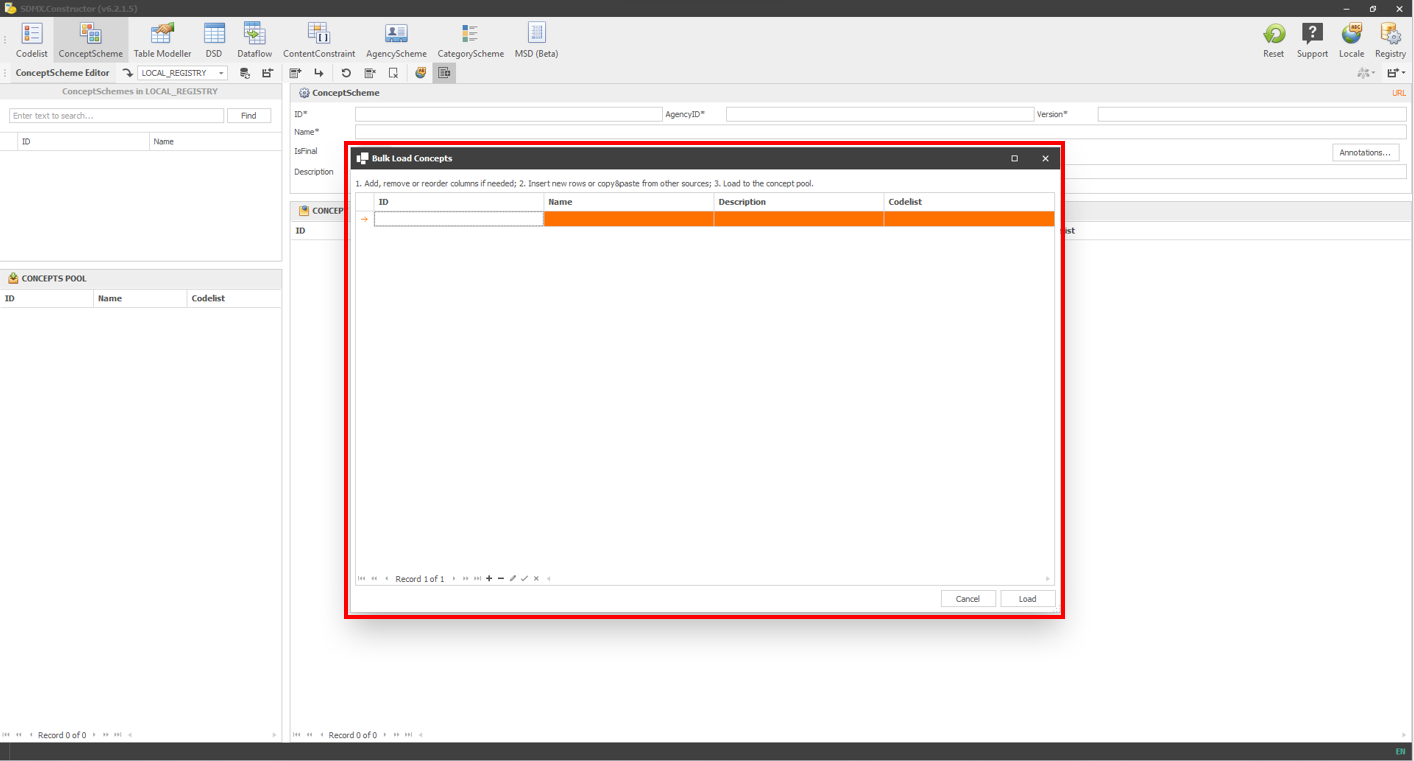 Click here to enlarge the image
- Copy the ConceptScheme table (Table: 4.3) we prepared before and paste its contents here. Before pasting, remember to click on the ID column and select the entire row (by clicking on the little arrow at the beginning of the rows).
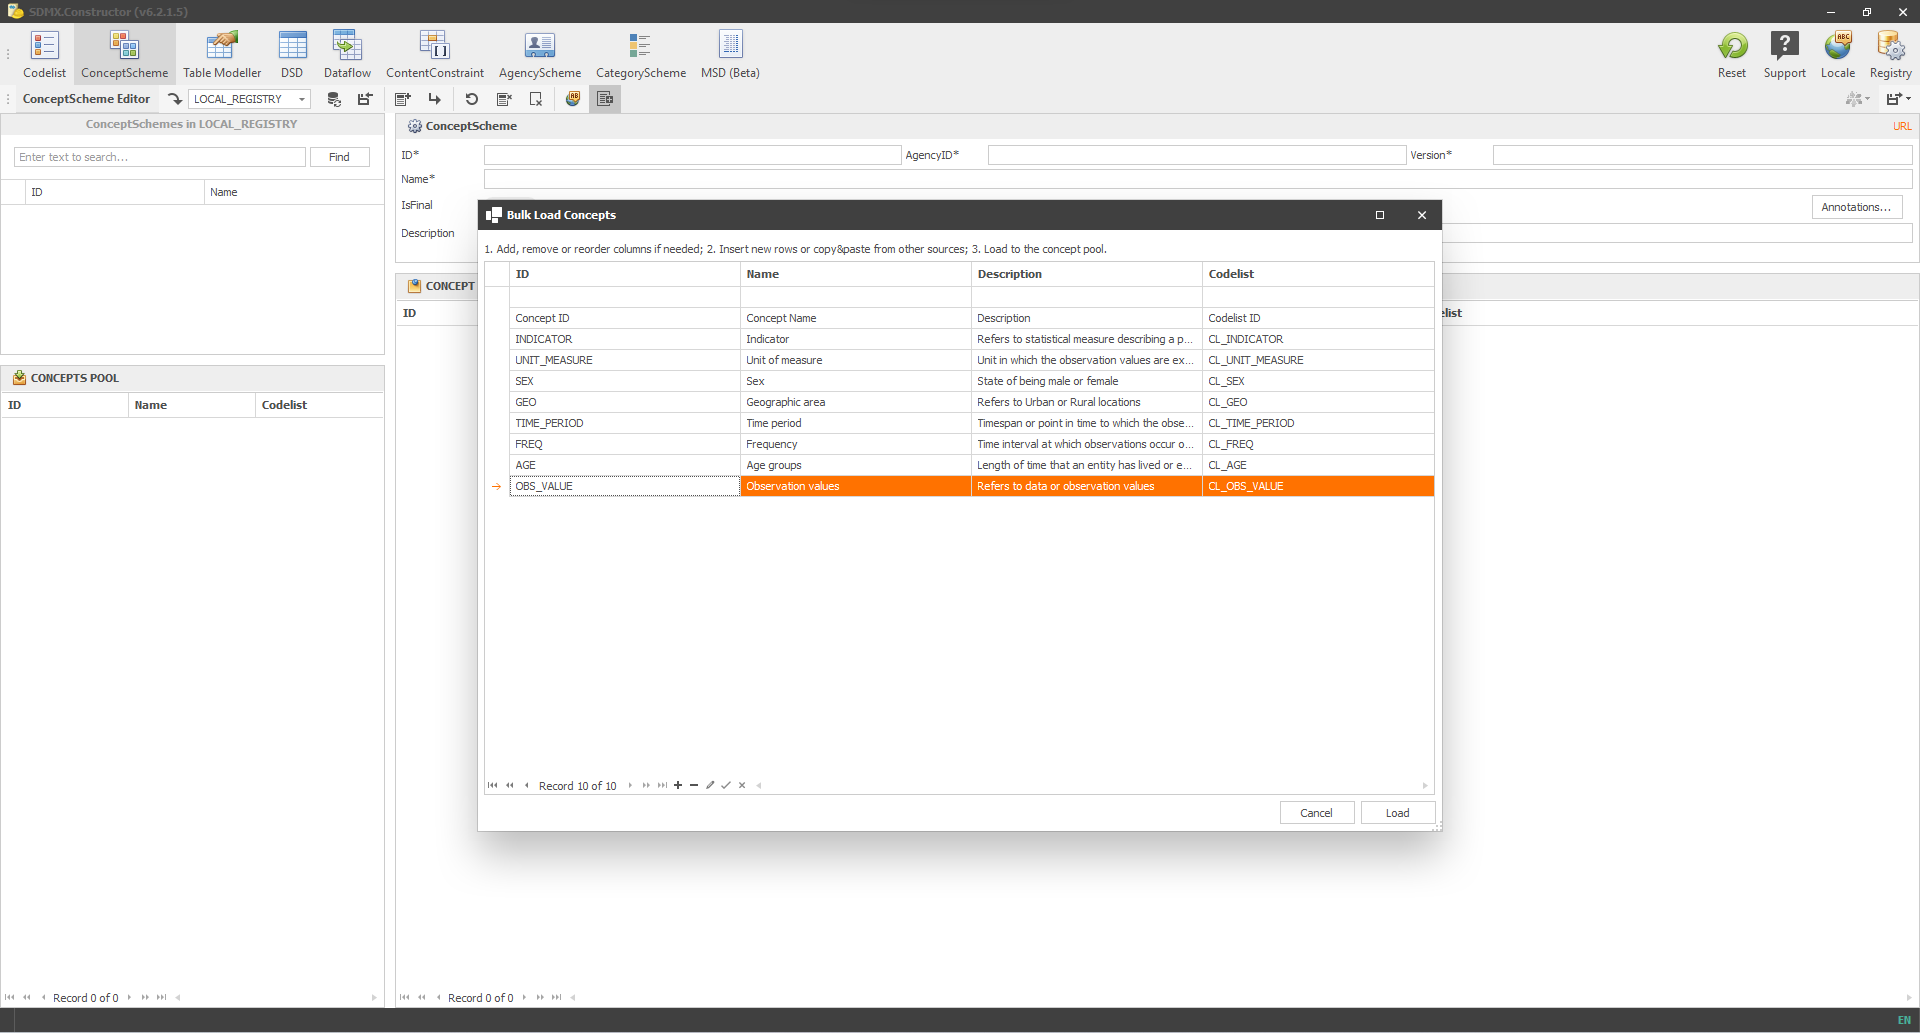 Click here to enlarge the image
- After pasting, remember to delete the header row by selecting the entire row and using the button (“-”) below, as indicated by a downward red arrow.
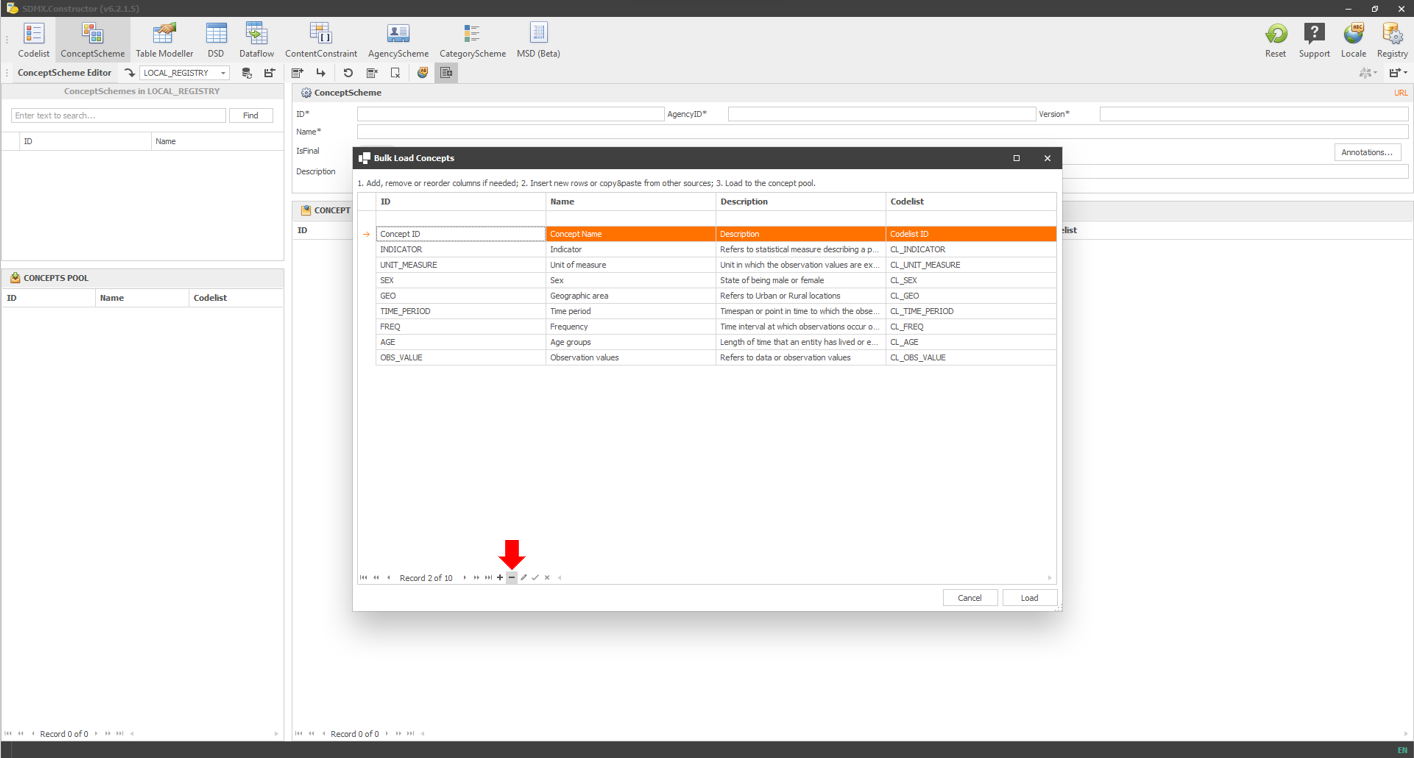 Click here to enlarge the image
- Click on Load, as shown below.
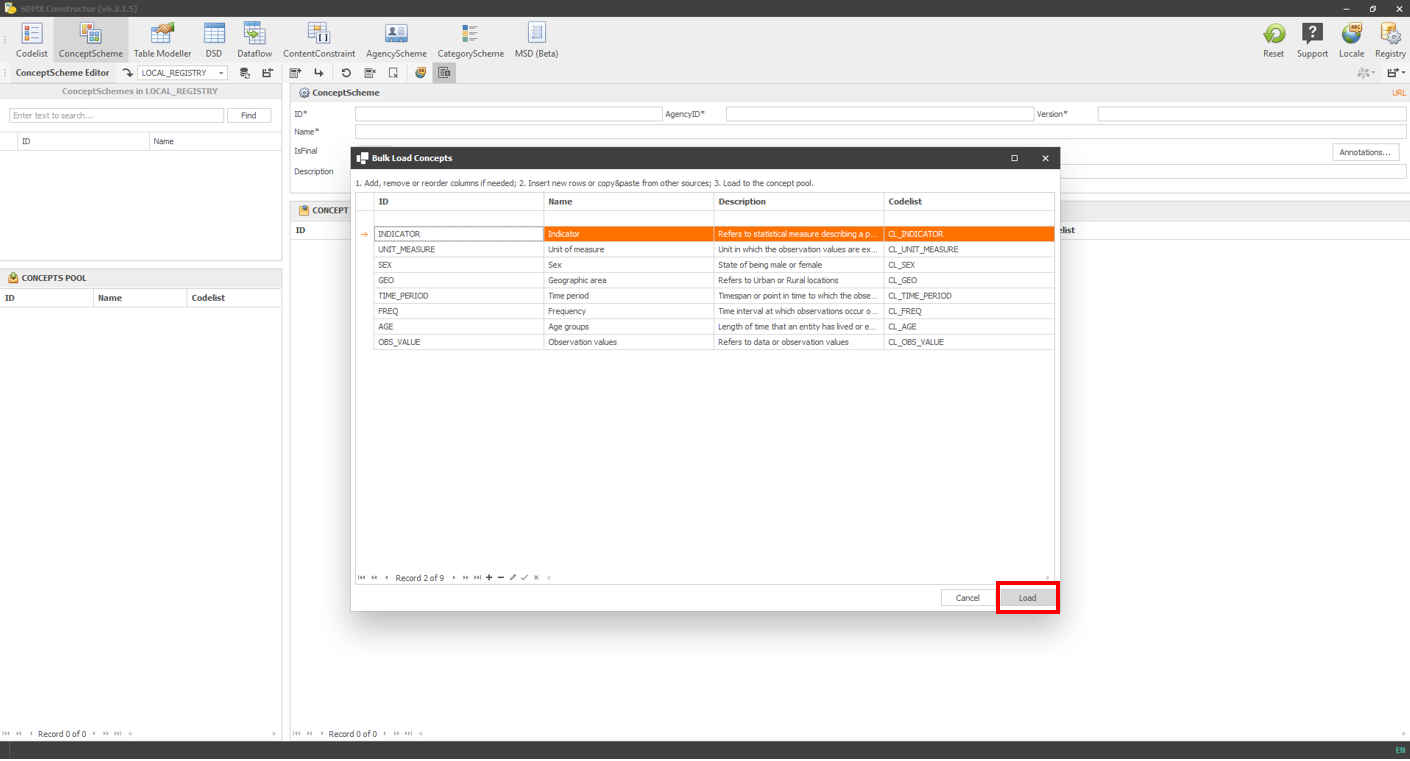 Click here to enlarge the image
- After loading, the concepts will be visible in the CONCEPT POOL, as shown below.
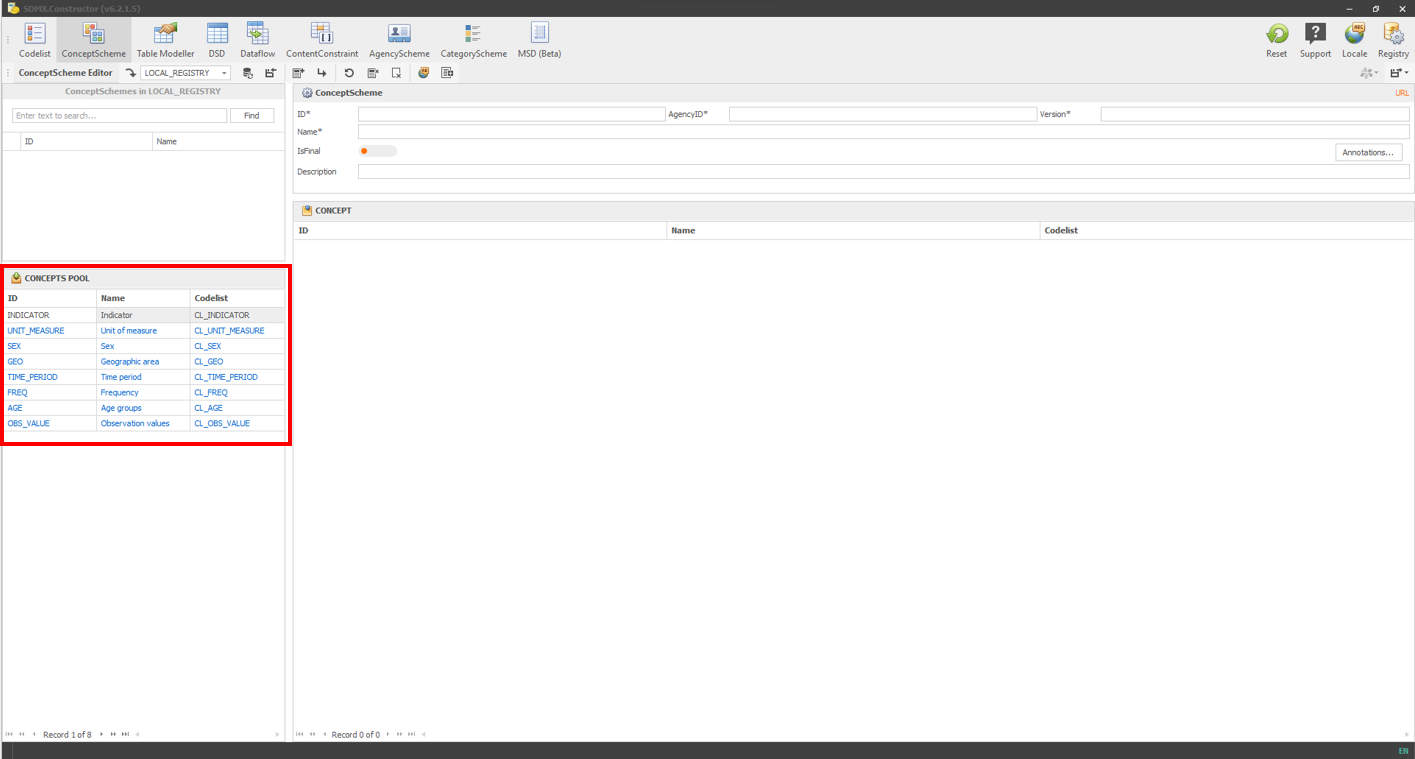 Click here to enlarge the image
- Move all the concepts from the CONCEPT POOL to the CONCEPT pane by selecting all (ctrl + a), then dragging and dropping. After the move, it would look like the following.
 Click here to enlarge the image
- After moving the concepts, enter the details: (ID: CS_DEMOLAND_NSO, AgencyID: DEMOLAND_NSO, Version: 1.0, and Name: Concept Scheme of Demoland NSO) for the ConceptScheme, as shown below.
 Click here to enlarge the image
- Then, click the ‘Save with descendants’ from the save option as shown below. This option, ‘Save with descendants,’ will save the concept scheme with the codelist.
 Click here to enlarge the image
- A pop-up message will ask to save the XML file in the folder (LOCAL_REGISTRY) we created before. Click on Save to save the file.
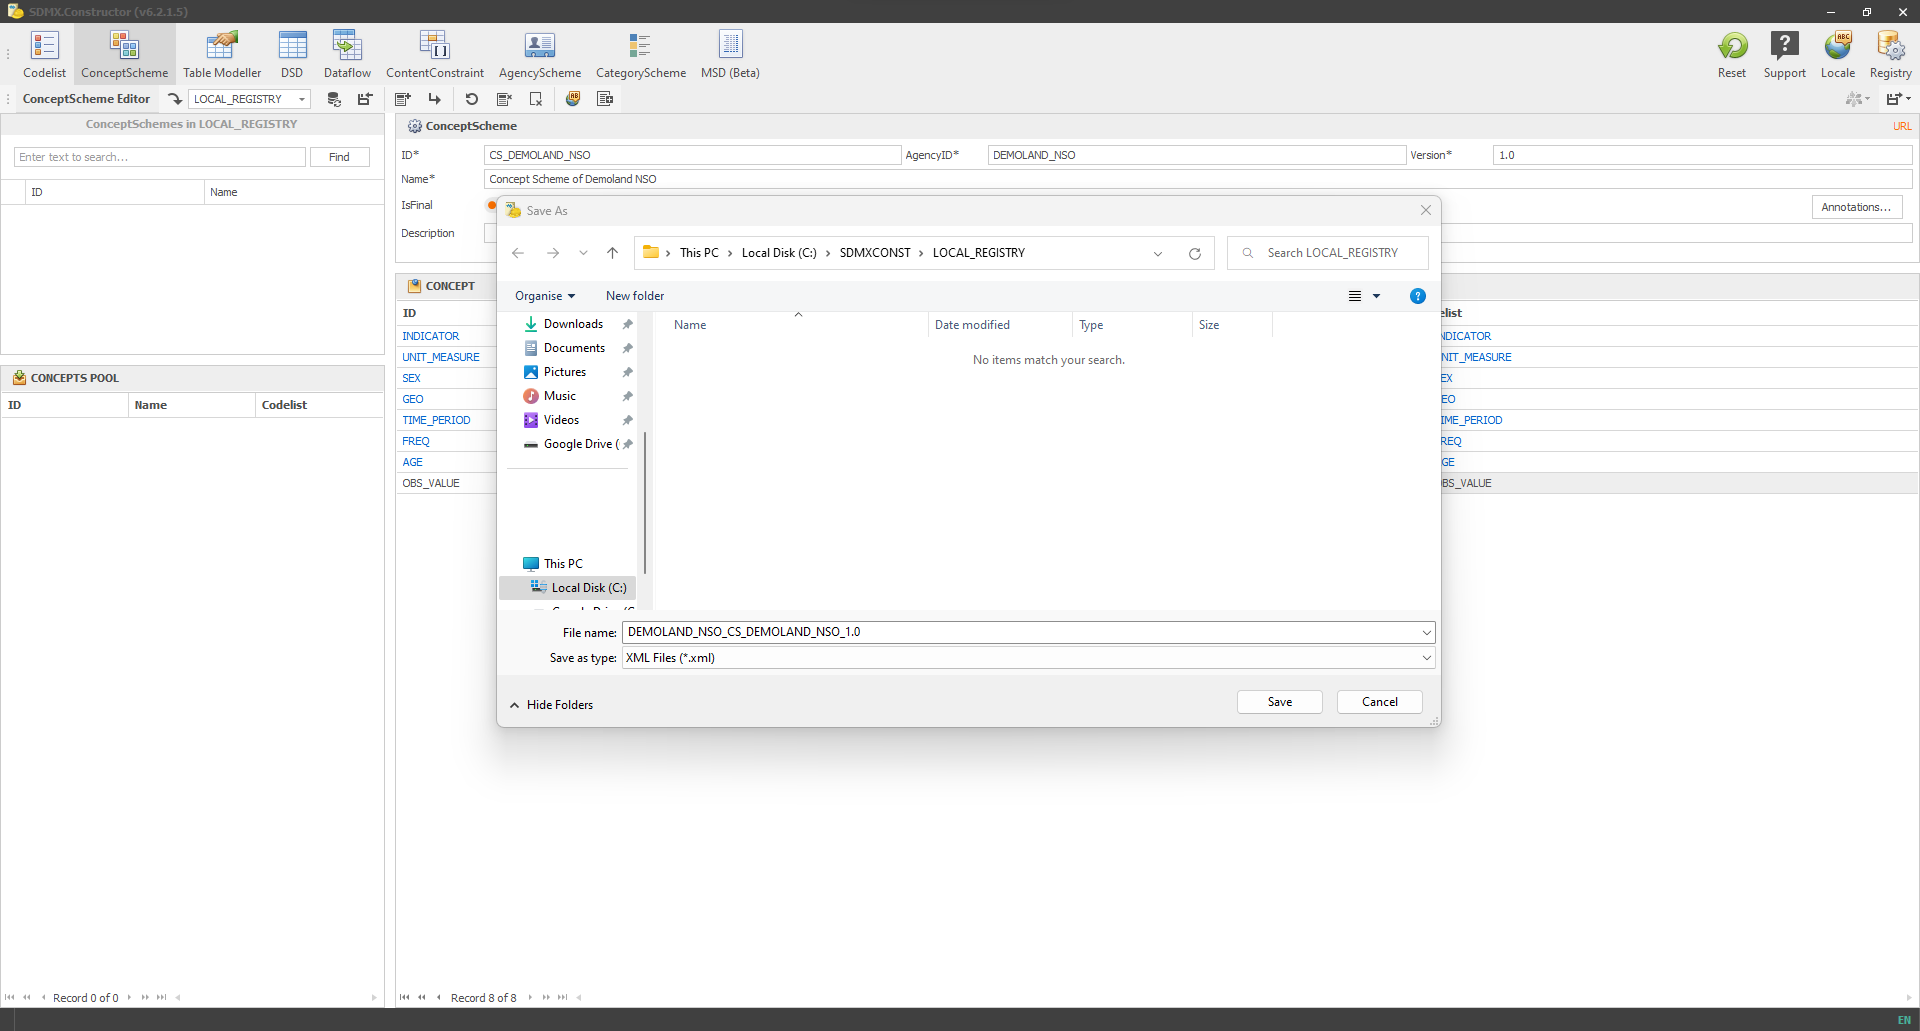 Click here to enlarge the image
- After clicking Save, the tool will ask the question to merge files. Select Yes.
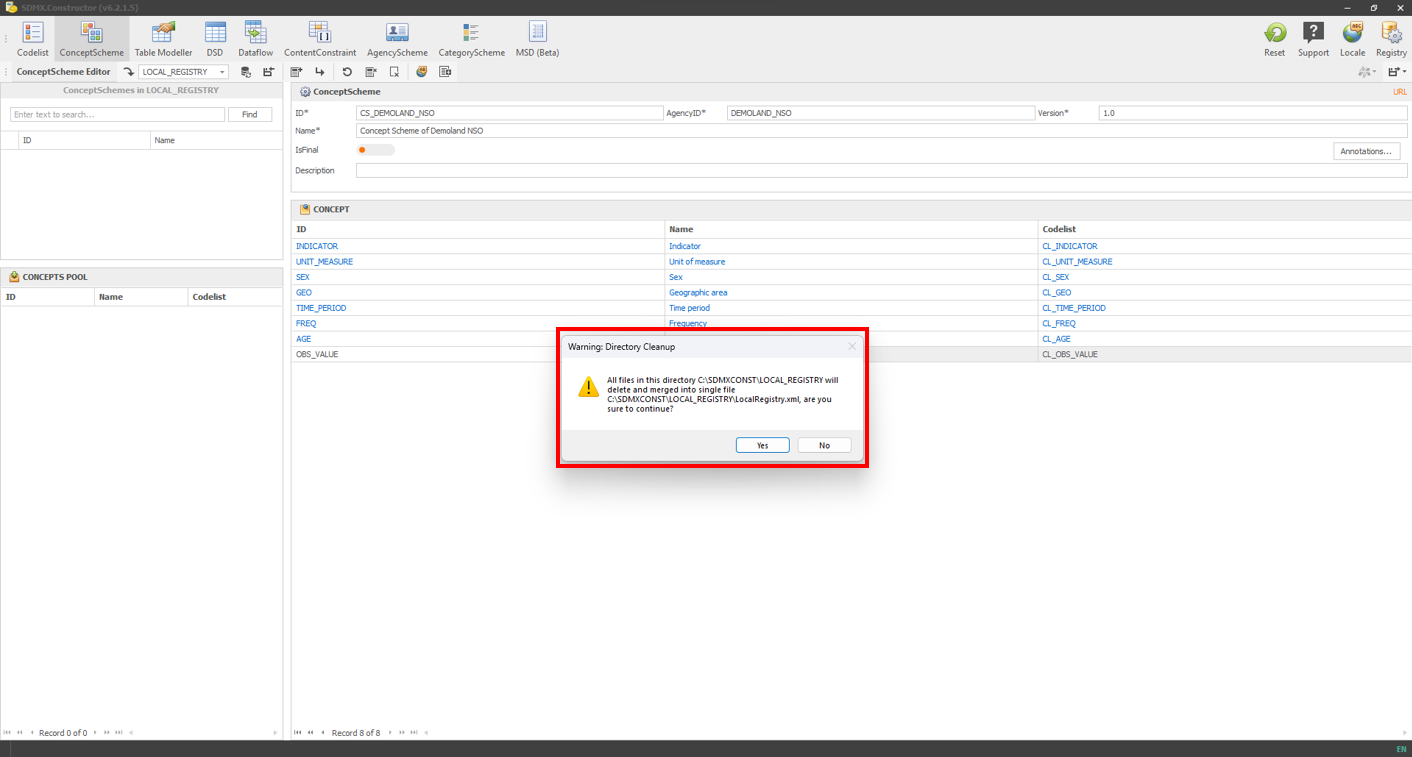 Click here to enlarge the image
- A confirmation message will appear for a short time at the bottom right corner, as shown below.
 Click here to enlarge the image
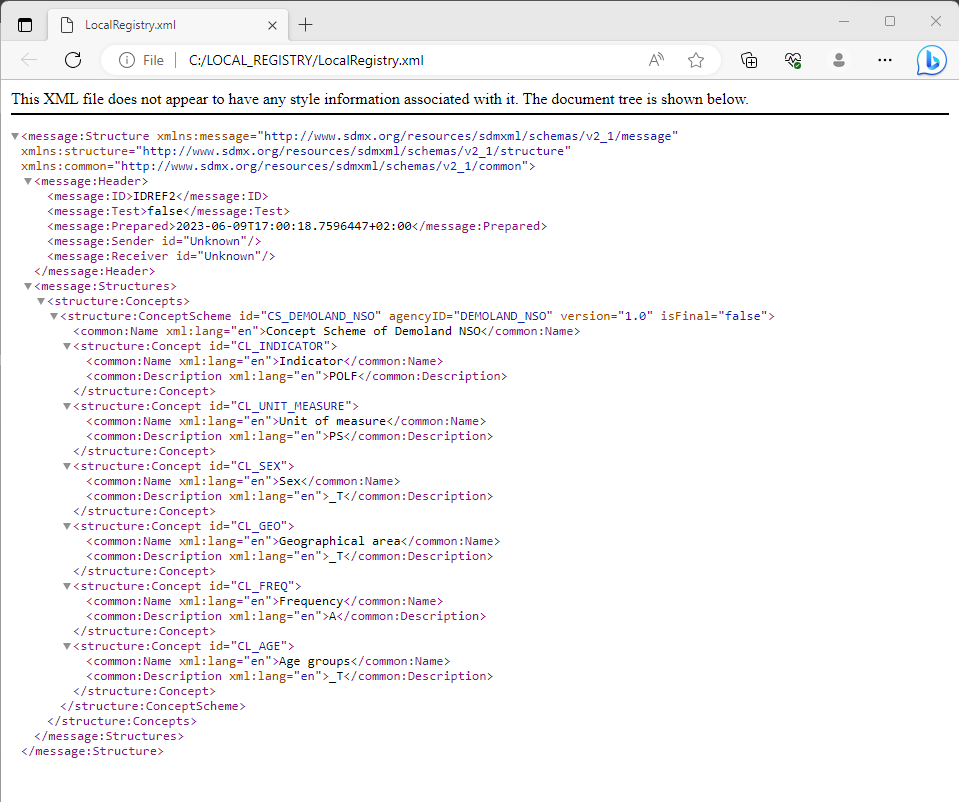
- After that, if you go to the file’s location, you will see the XML file created, as shown below.
 Click here to enlarge the image
- Opening the XML file will show the details containing, AgencyScheme, ConceptScheme and Codelists.